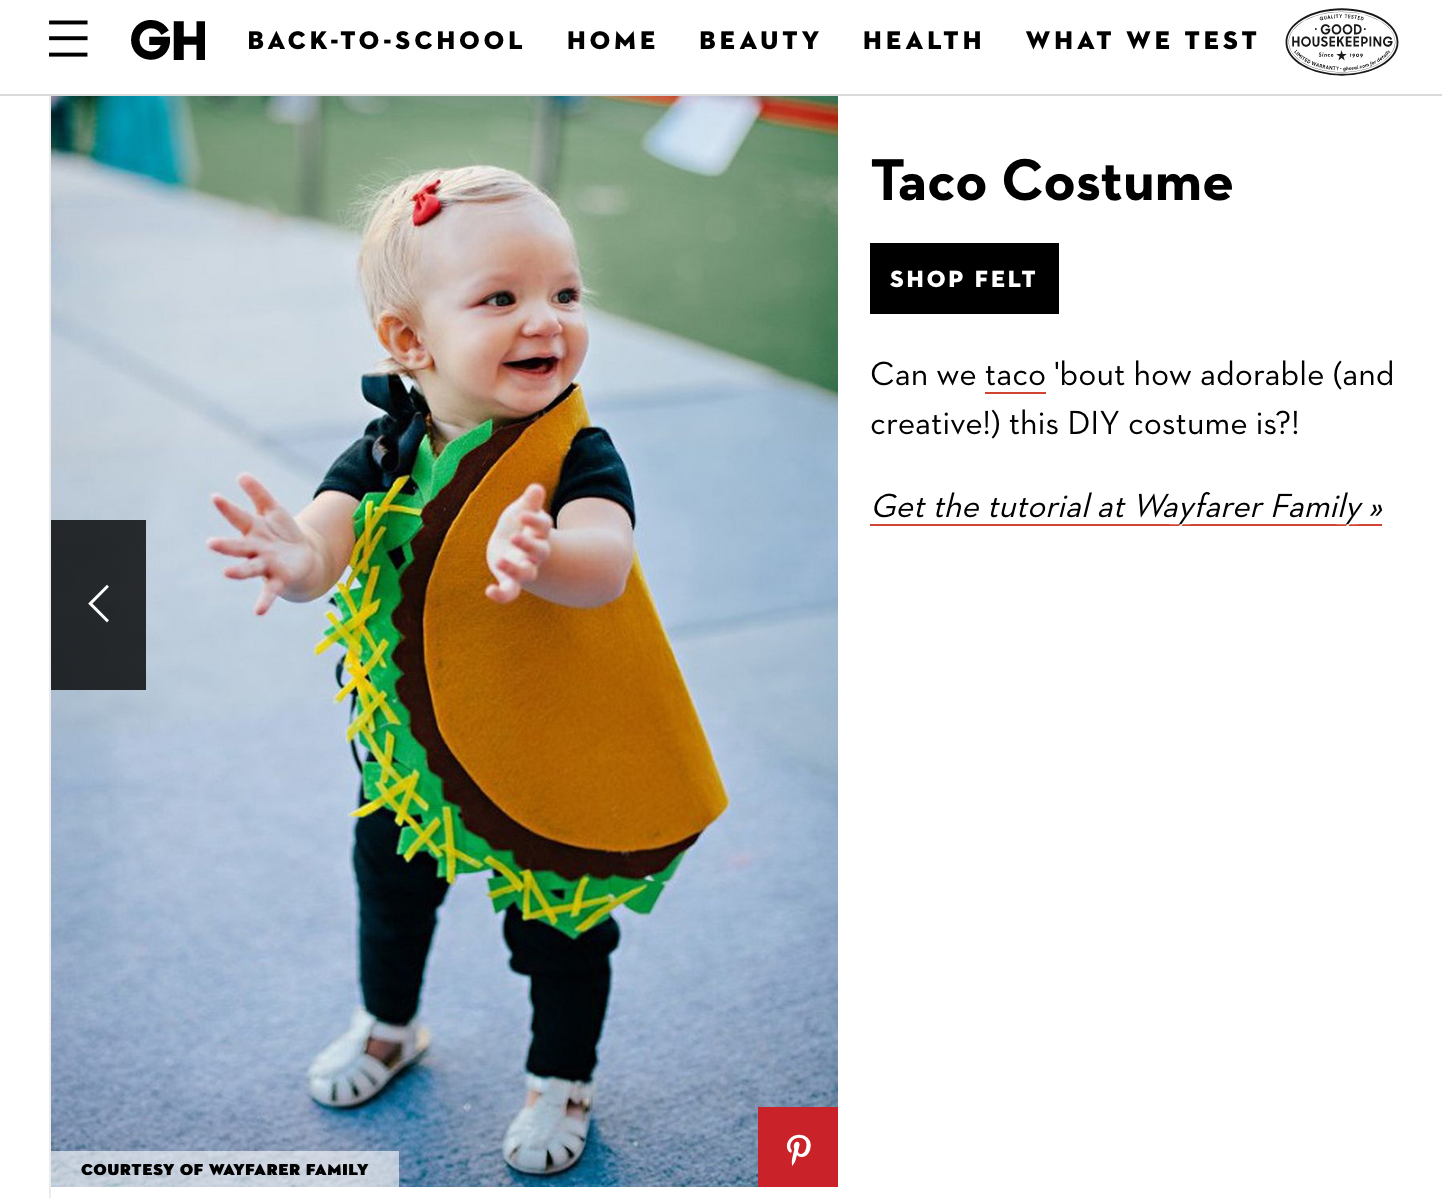
The other day a friend texted us to share that Isla’s taco costume was on Good Housekeeping’s website!!! We are so tickled our homemade costume was featured, and hope it inspires some other taco-loving, glue gun masters out there to create their very own taco costumes!

We realized the original instructions we provided was pretty vague, so put together a step by step tutorial. This time I made a mini costume for Isla’s doll, Little Nini (yes, that is her name!). I was kind of secretly hoping the costume would also fit Charlie, and it did!
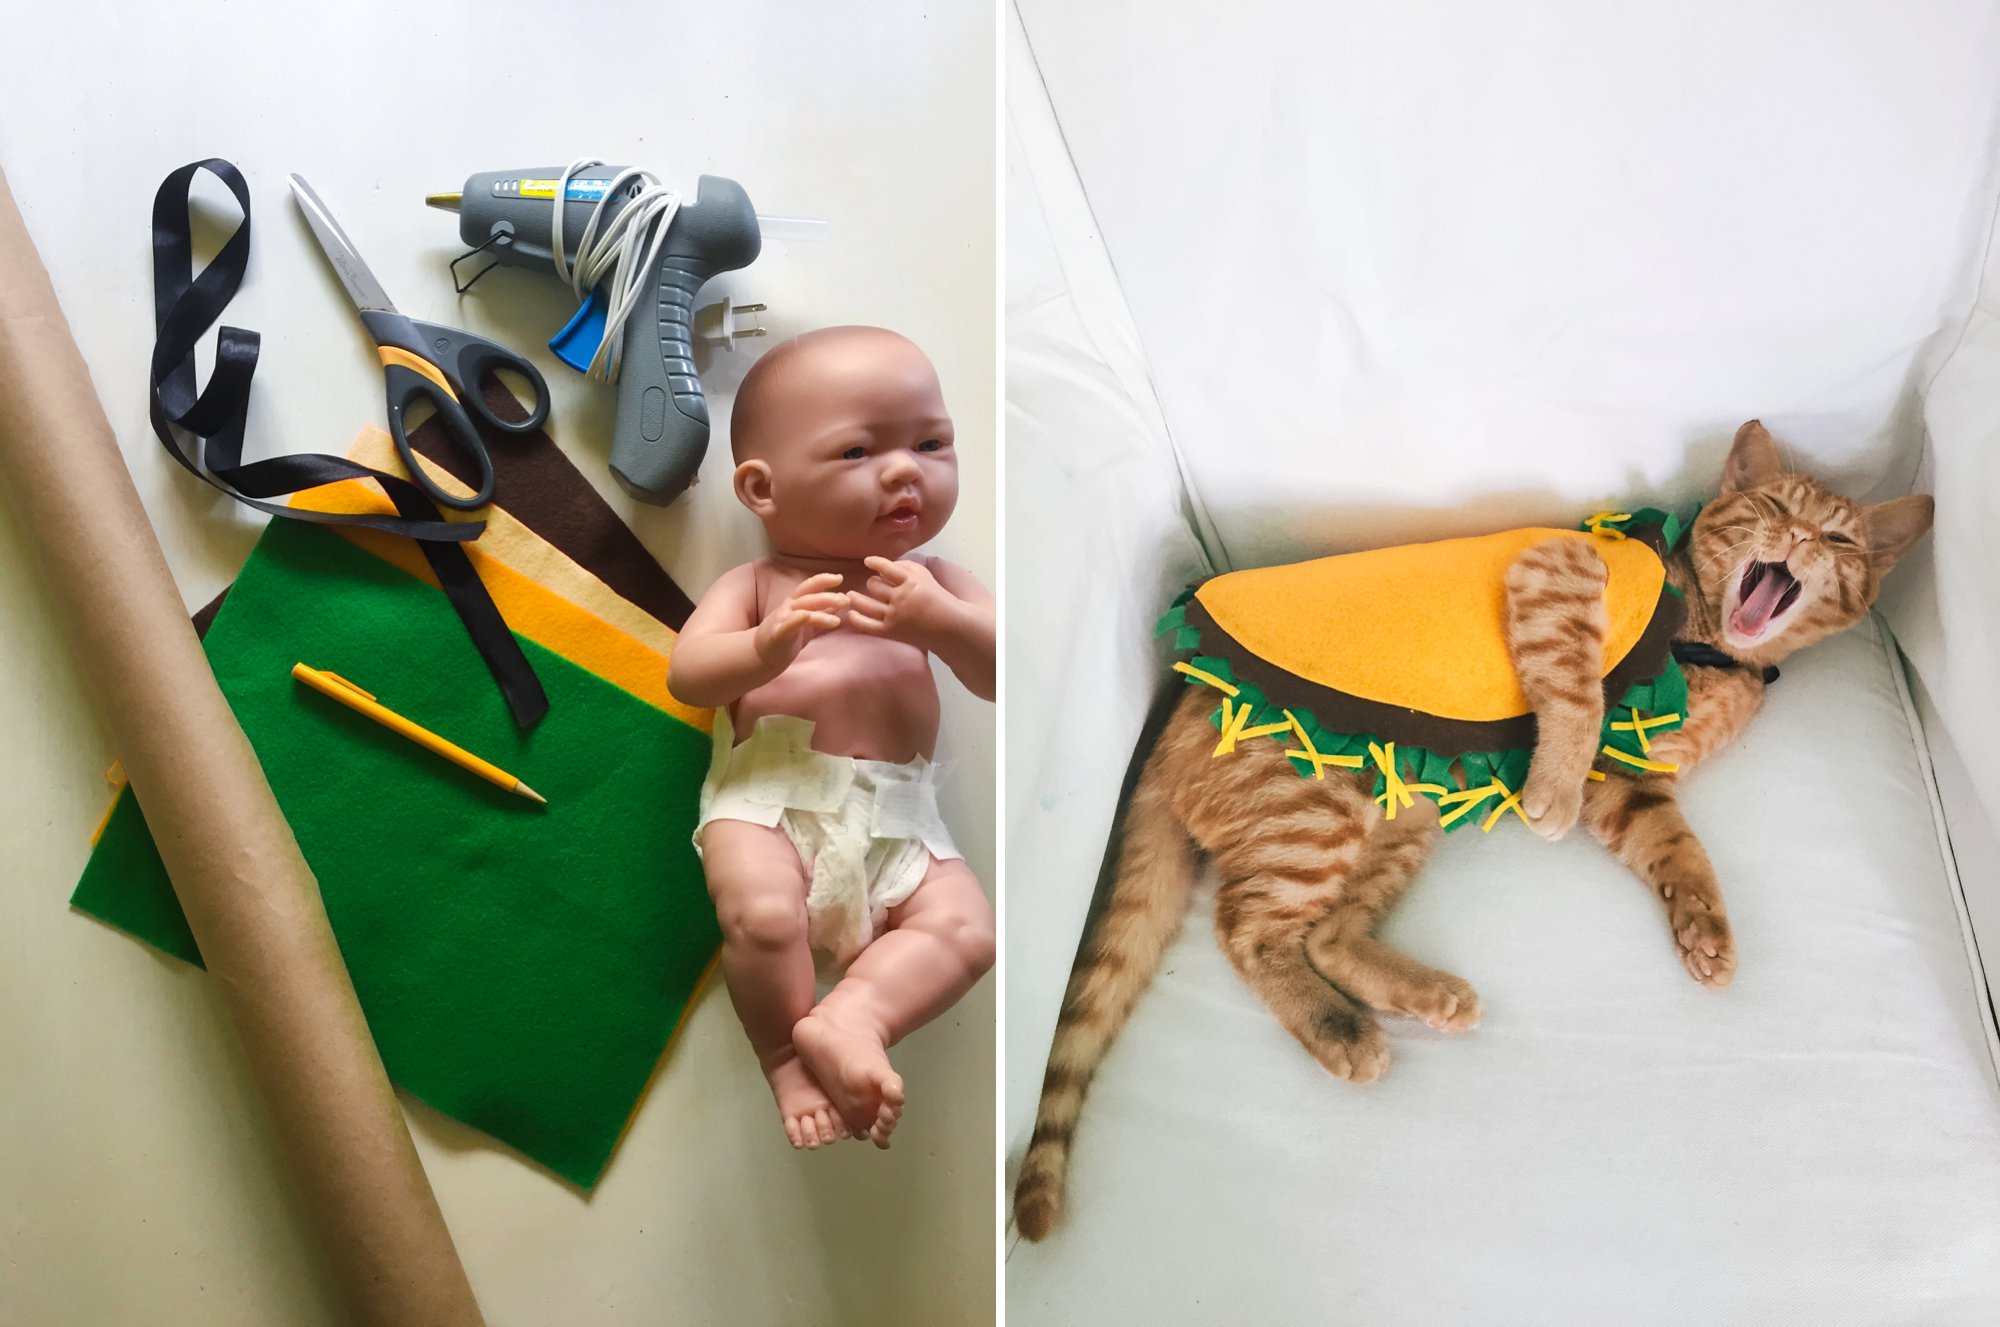
Supplies:
- Colored felt– golden for taco shell, brown for taco meat, green for lettuce, and yellow for cheese (we don’t eat tomatoes on our tacos, so we made a costume to reflect that, but you could also add cute little squares of red felt “tomatoes” too)
- Sharp scissors
- Hot glue gun (make sure to have a couple of glue sticks)
- Ribbon (we chose black to blend in with the black clothes Isla wore under the costume)
- 1 Roll of kraft paper for the pattern (we get ours from the Dollar Store)
- Pencil
- Straight Pins

- Use the kraft paper to make a pattern. Fold the paper in half and draw a half moon shape on the folded side (this is the taco shell).
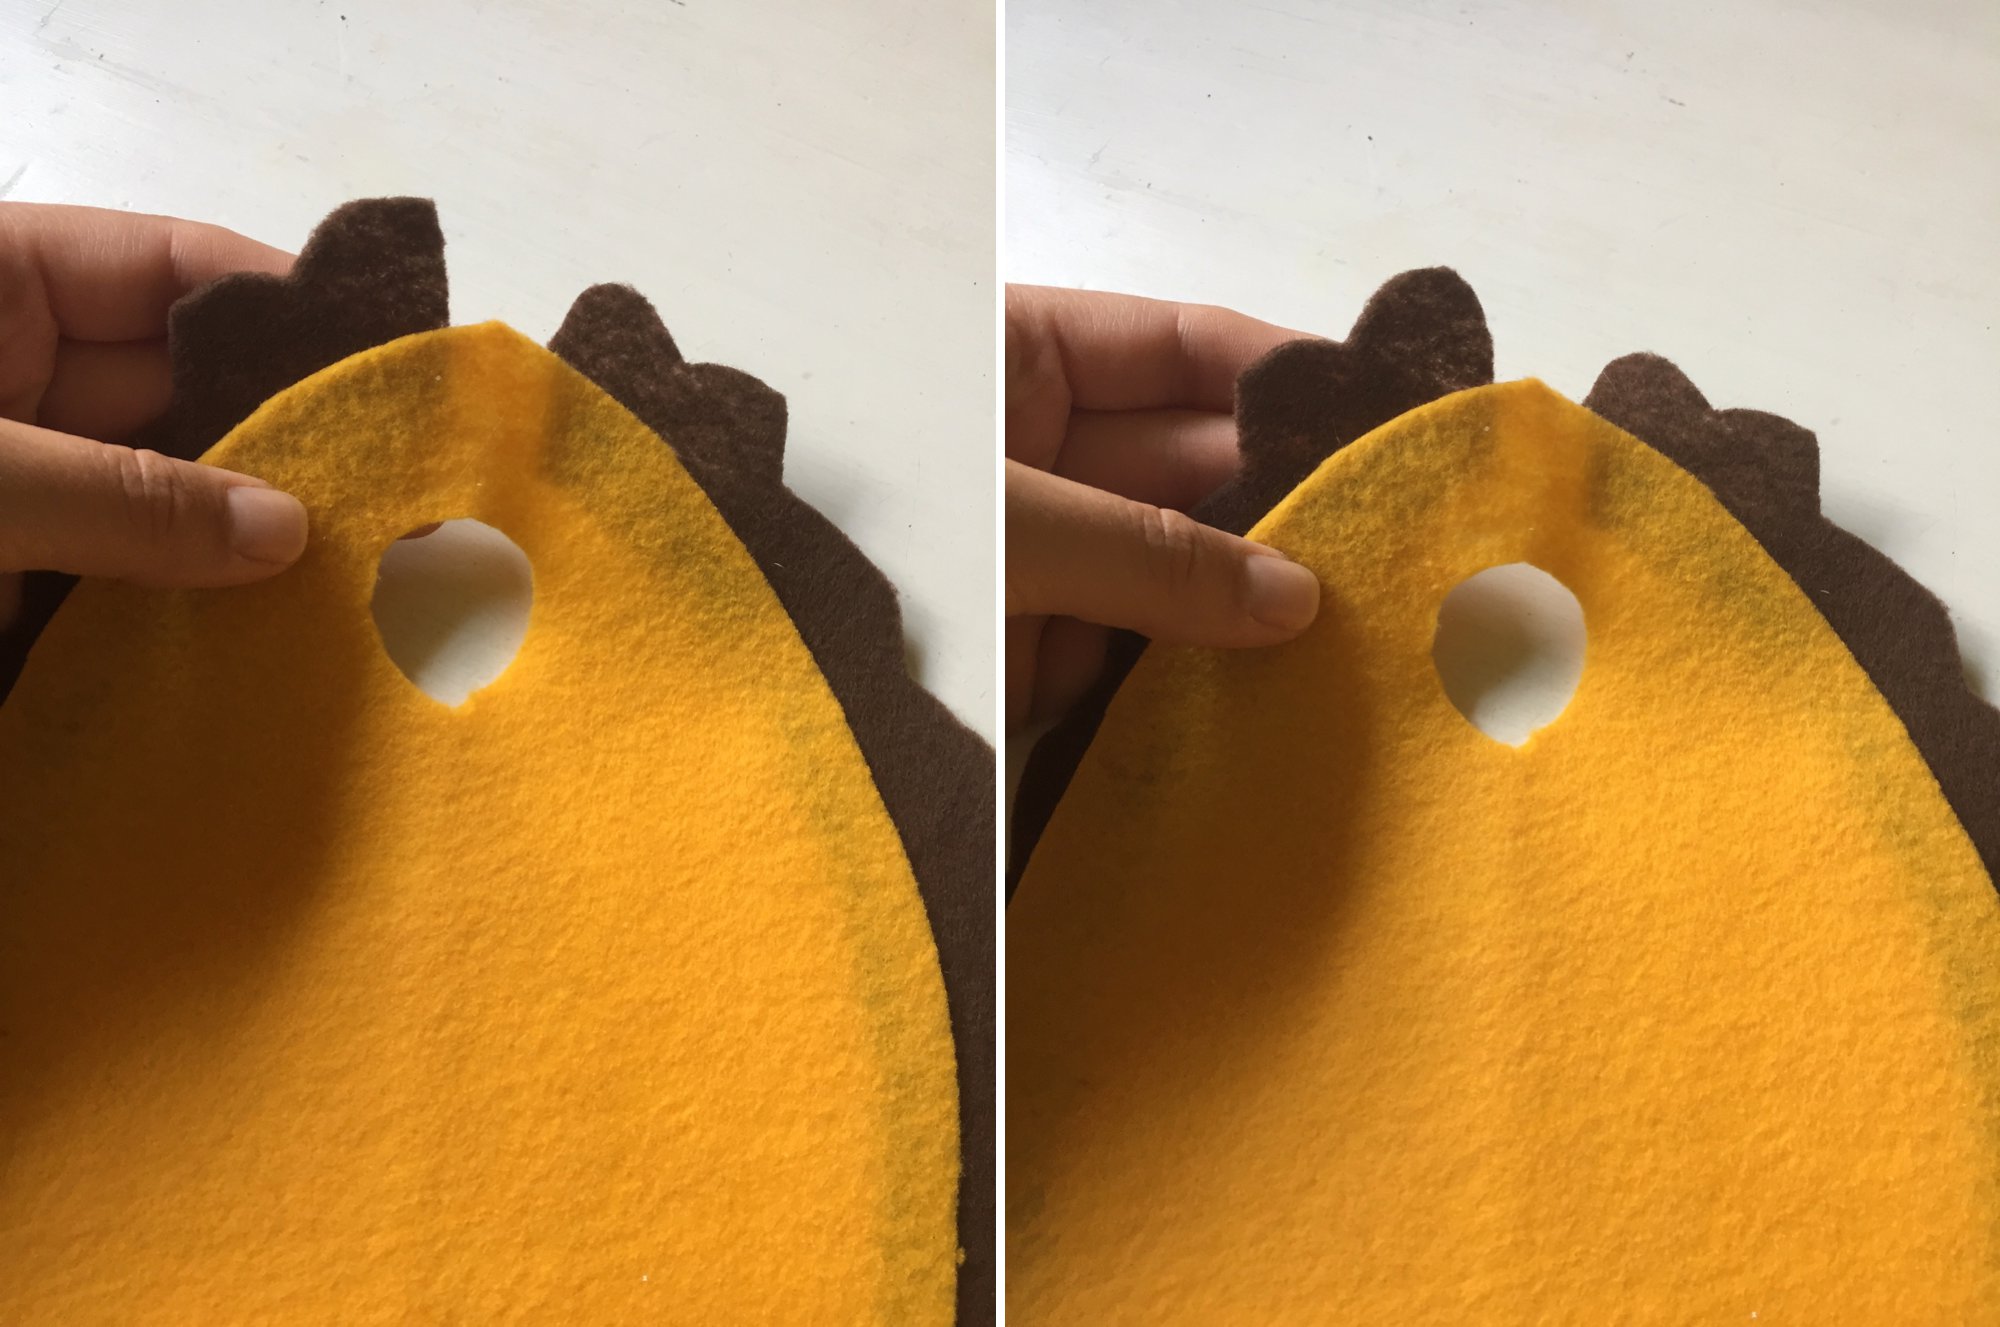
- Measure the taco shell pattern against your child to ensure it is the correct size. Make a mark where the arm hole should go.
- Cut out the taco shell pattern and arm hole.
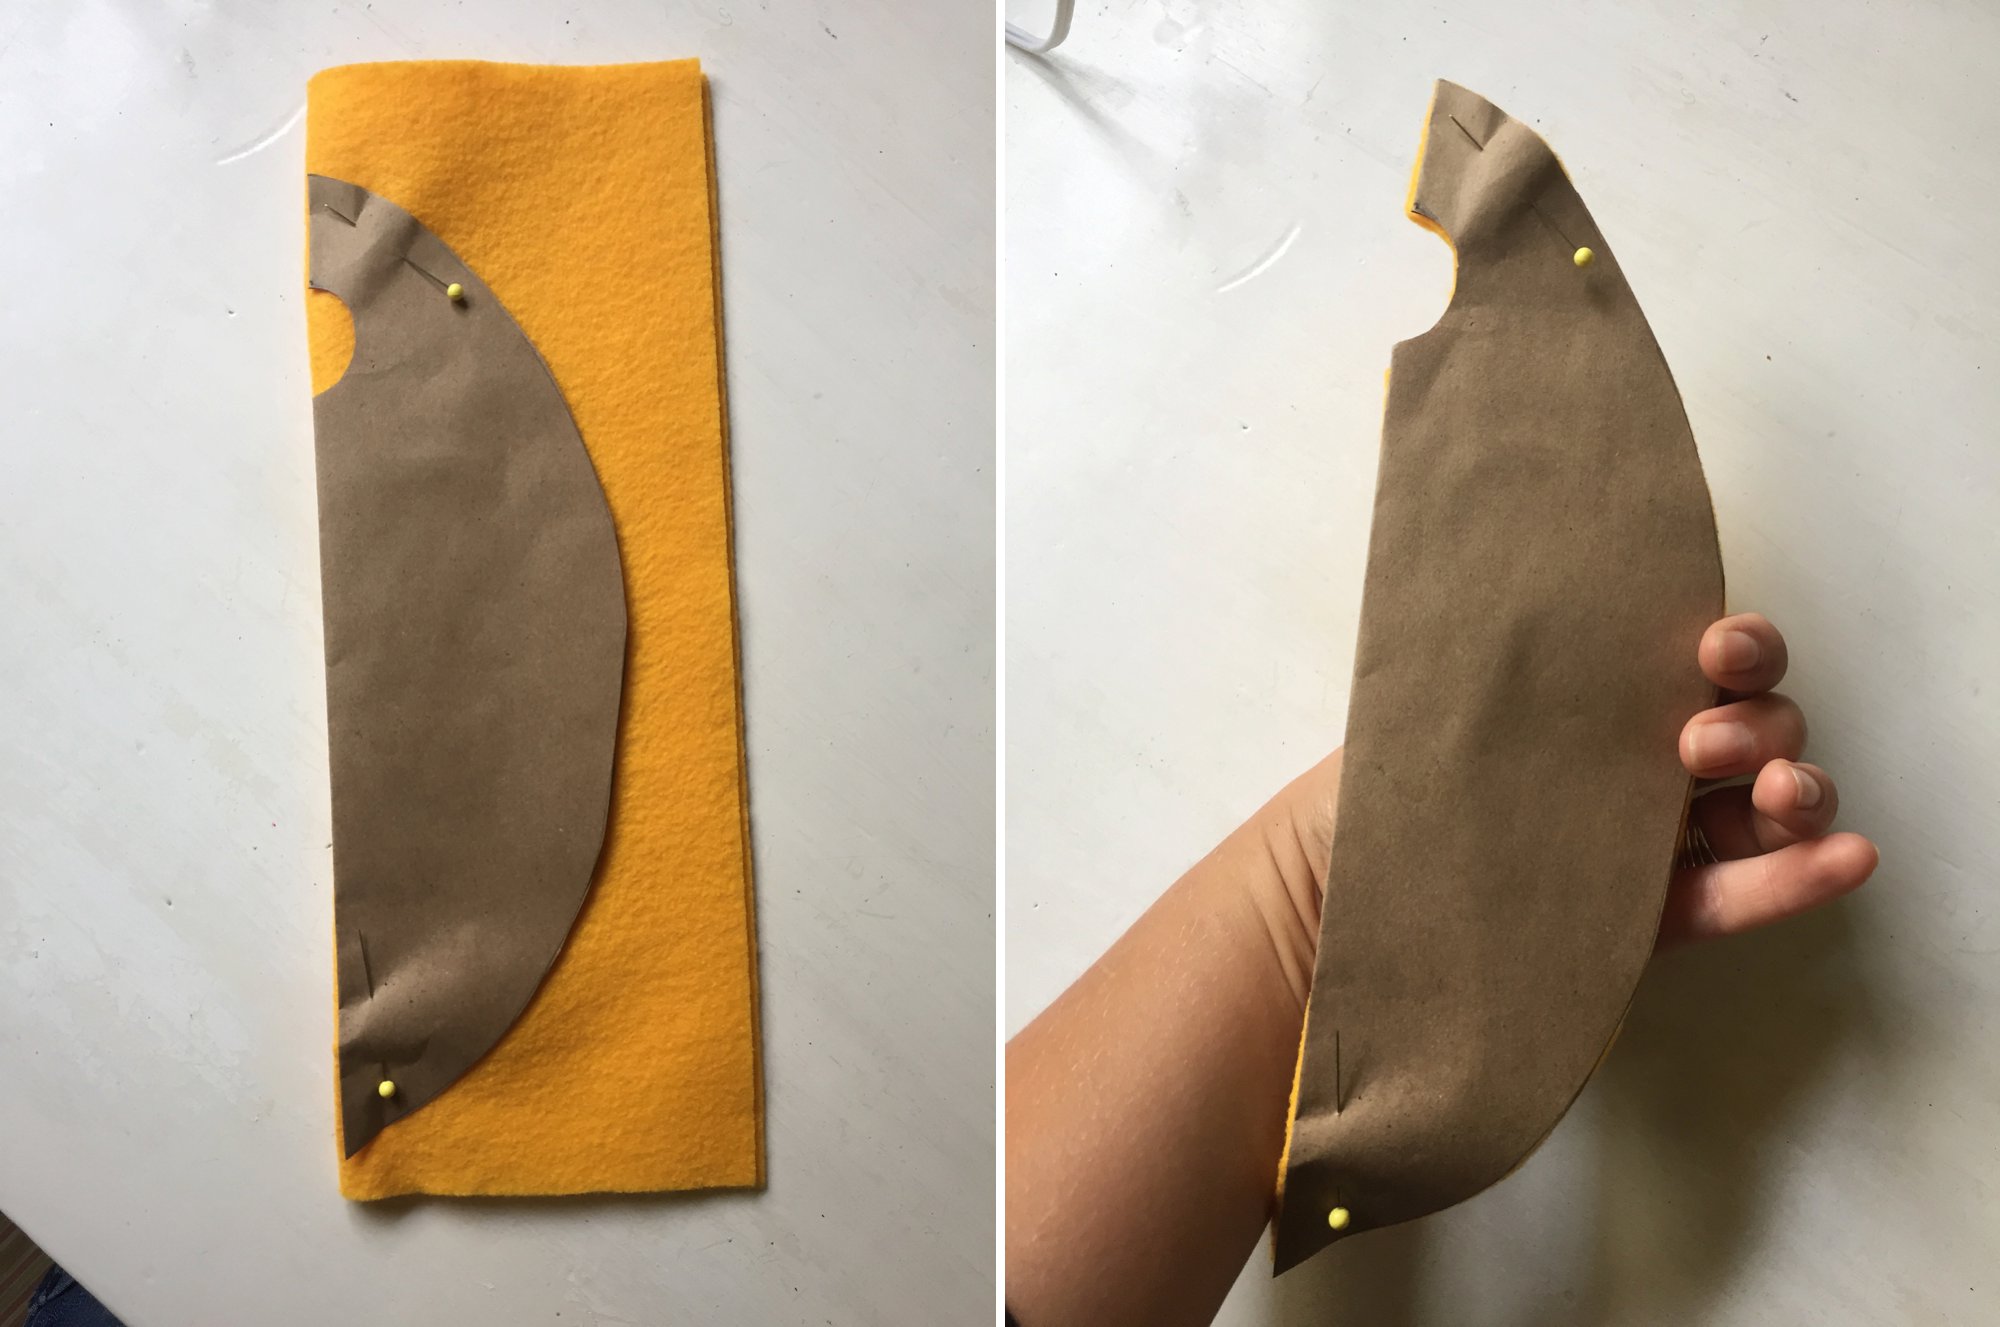
4. Fold the golden felt in half and pin the taco shell pattern to the folded side.
5. Cut out the felt along the pattern.
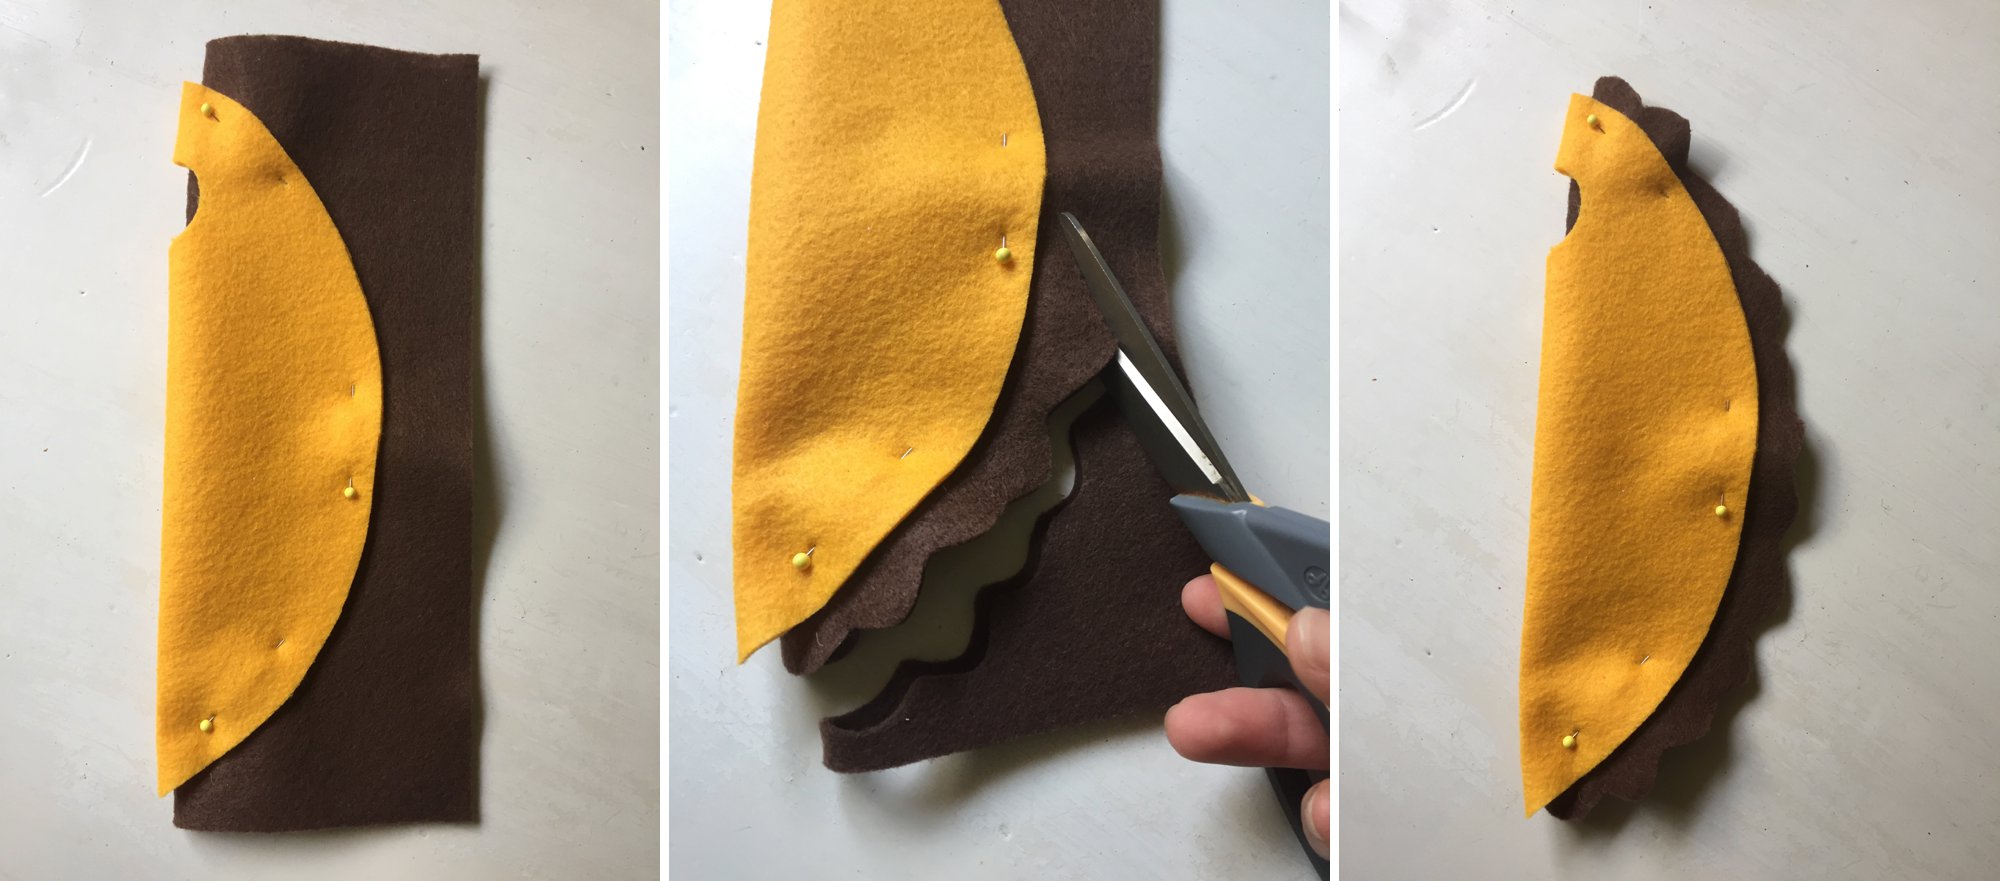
6. Fold the brown felt in half and pin the taco shell to the folded side
7. Using the edge of the taco shell as a guide, cut the brown fabric in a wavy line.
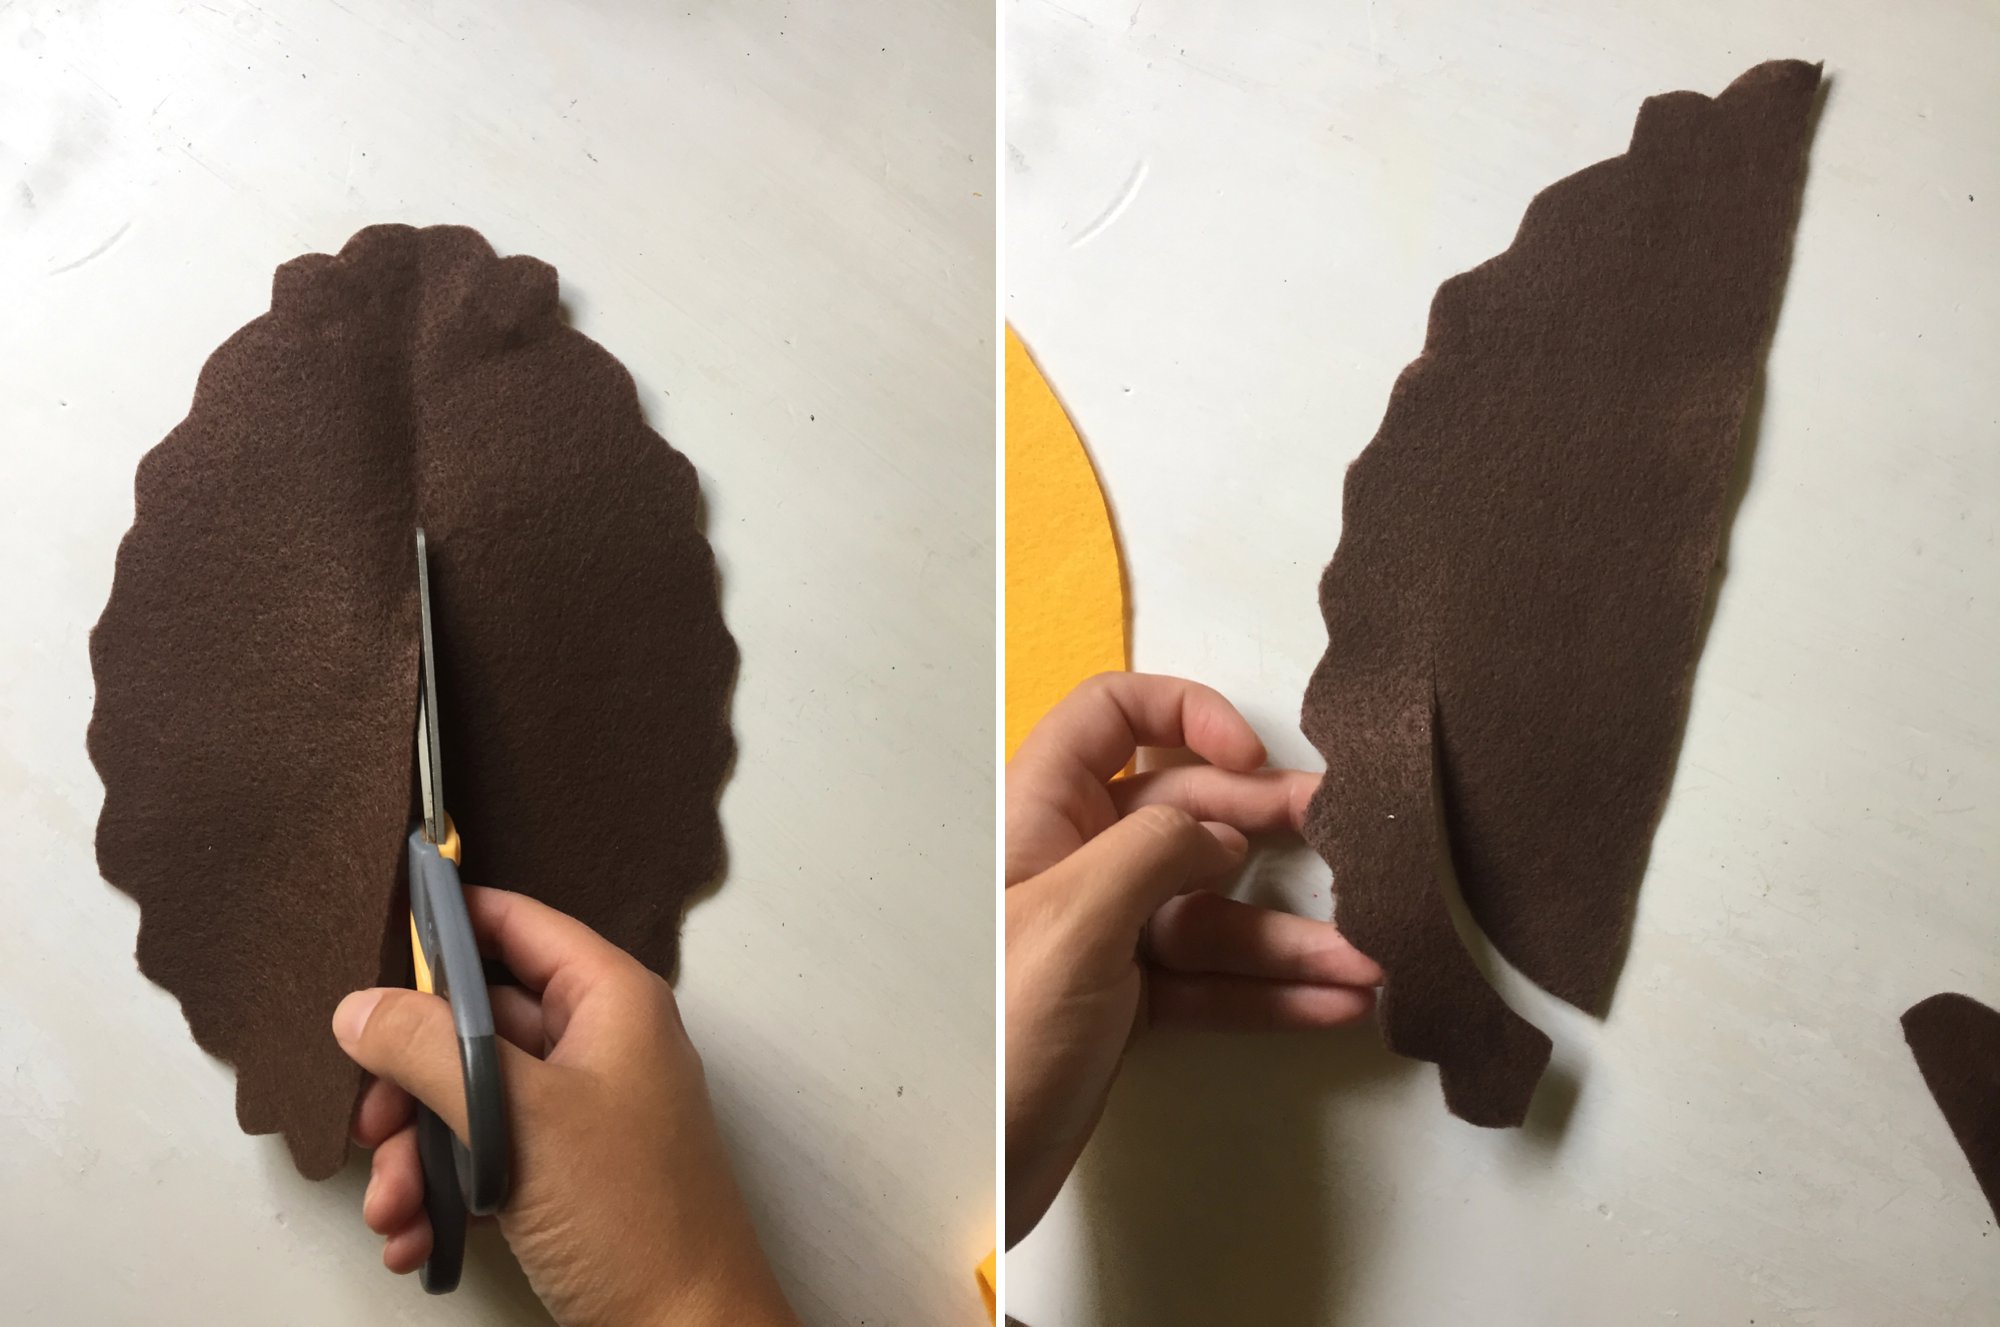
8. Remove the brown felt and cut it in half.
9. Cut the center portion of the brown felt out. This leaves you with an edge of “ground beef” around the taco.
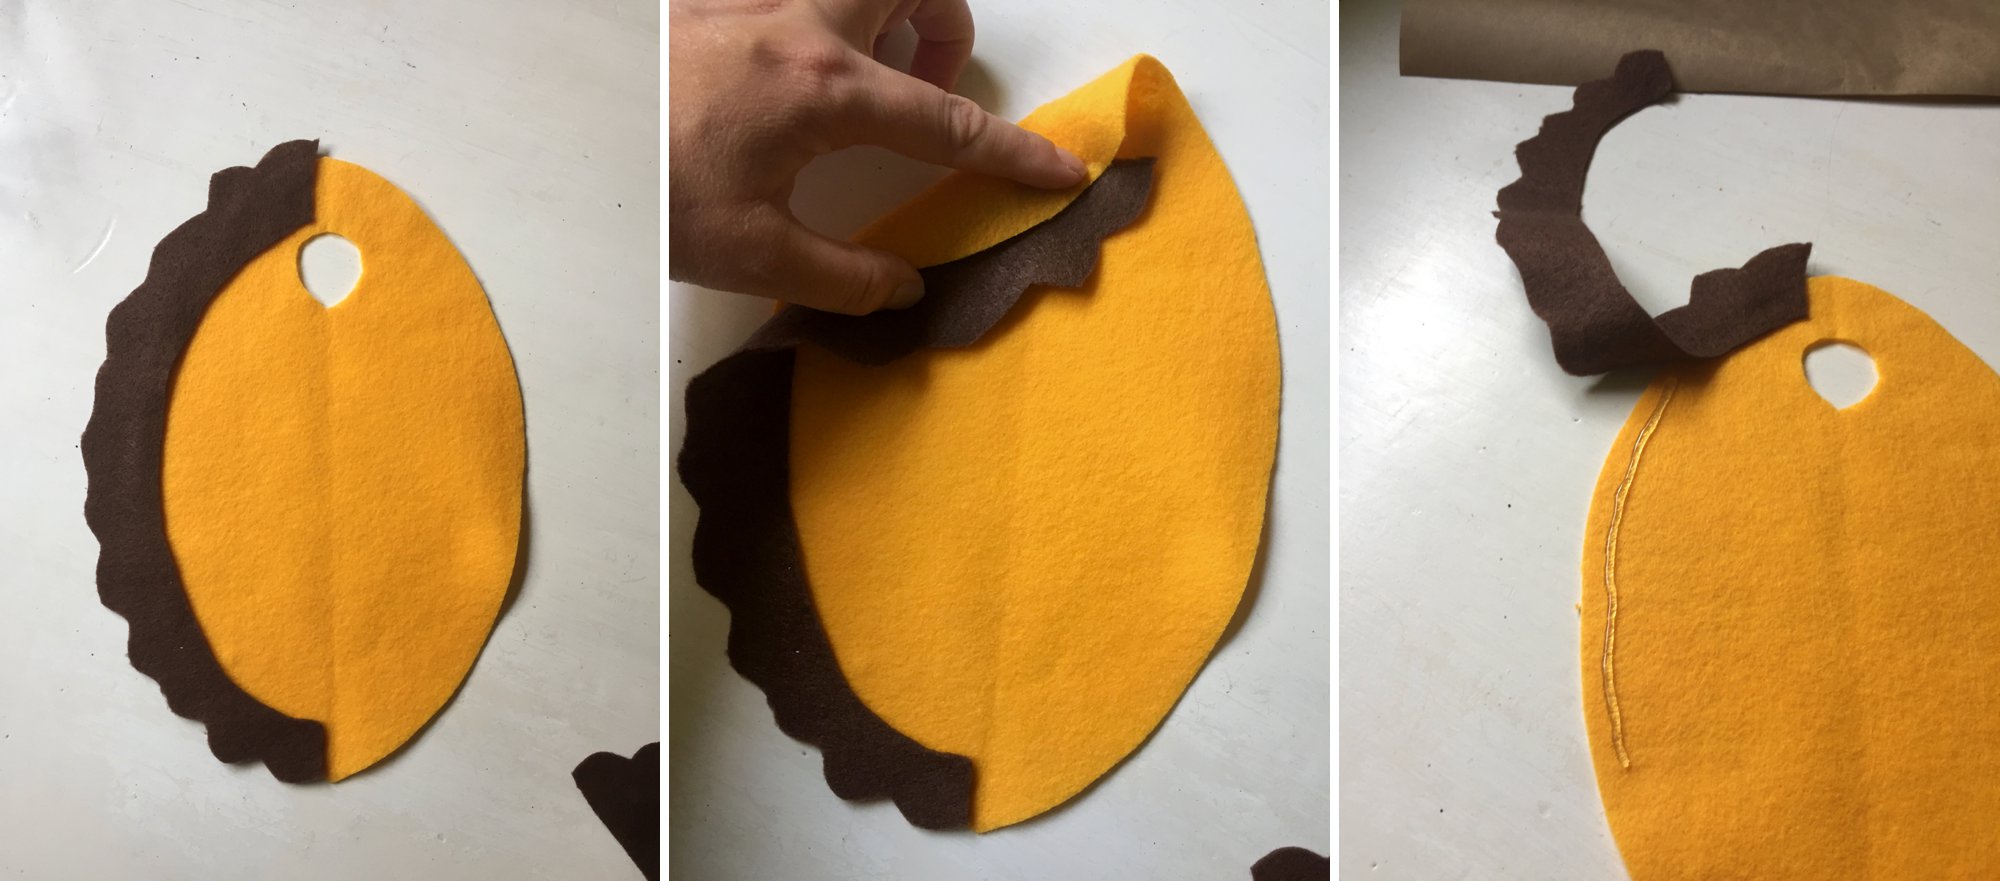
10. Line the brown felt up along the INSIDE edge of the golden felt.
11. Fold the felts over to the front to double check that the brown edge extends past the golden edge, so it gives the appearance of taco meat sticking out of the taco shell.
12. Attach the brown felt to the INSIDE edge of the golden felt using a line of hot glue.
If you find that the end of the “ground beef” is flat on the ends, just use the scissors to round it out.
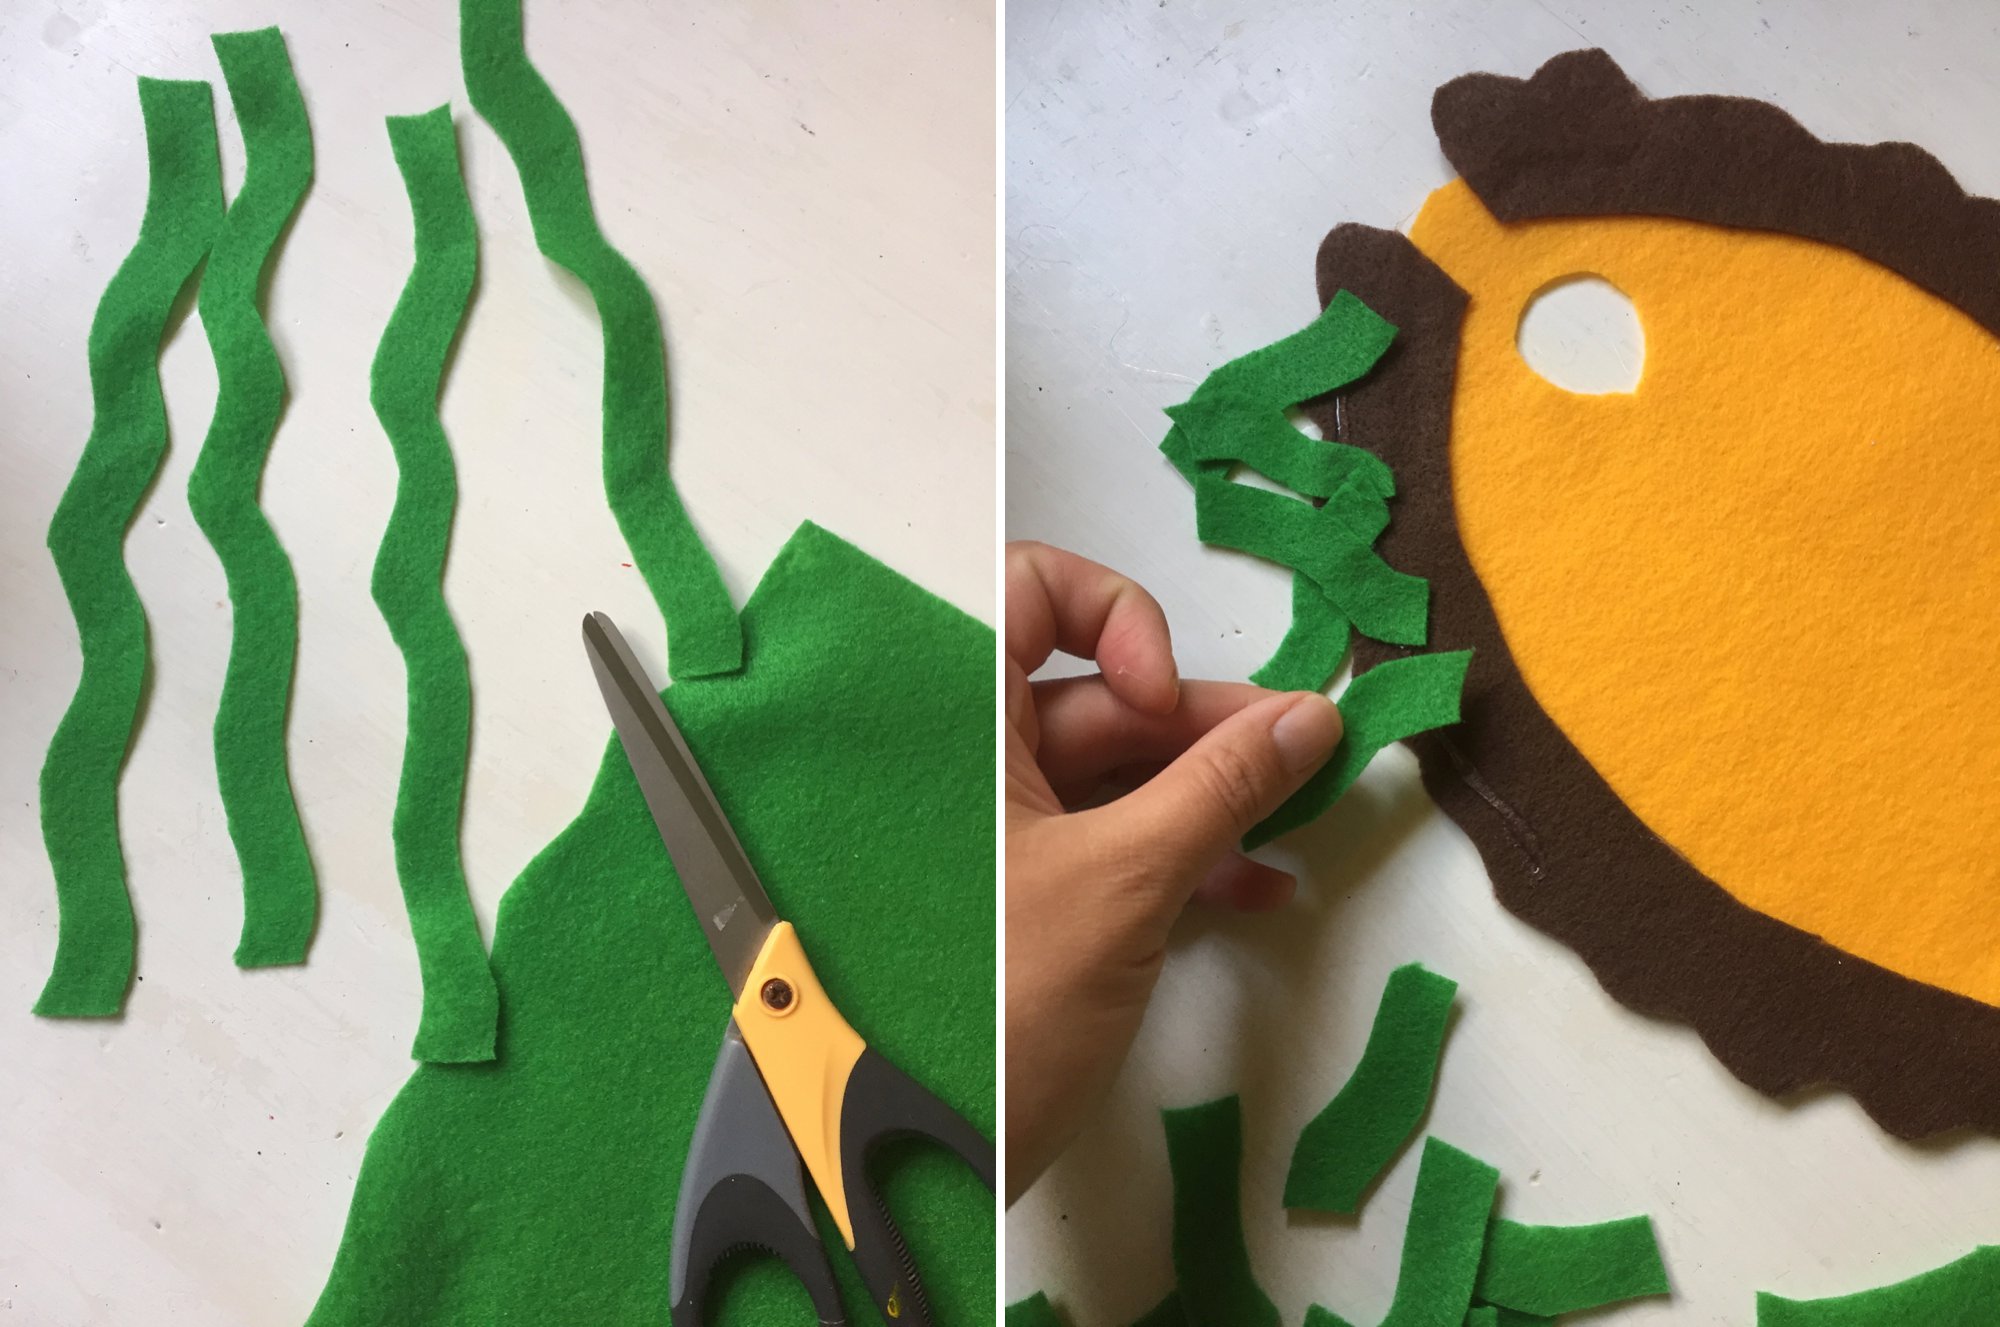
13. To make the “lettuce” cut out wavy strips of green felt.
14. Attach the green felt to the INSIDE of the brown felt using a strip of hot glue. Stick each piece of “lettuce” in a random, overlapping fashion, so it looks like the lettuce is spilling out of the taco.
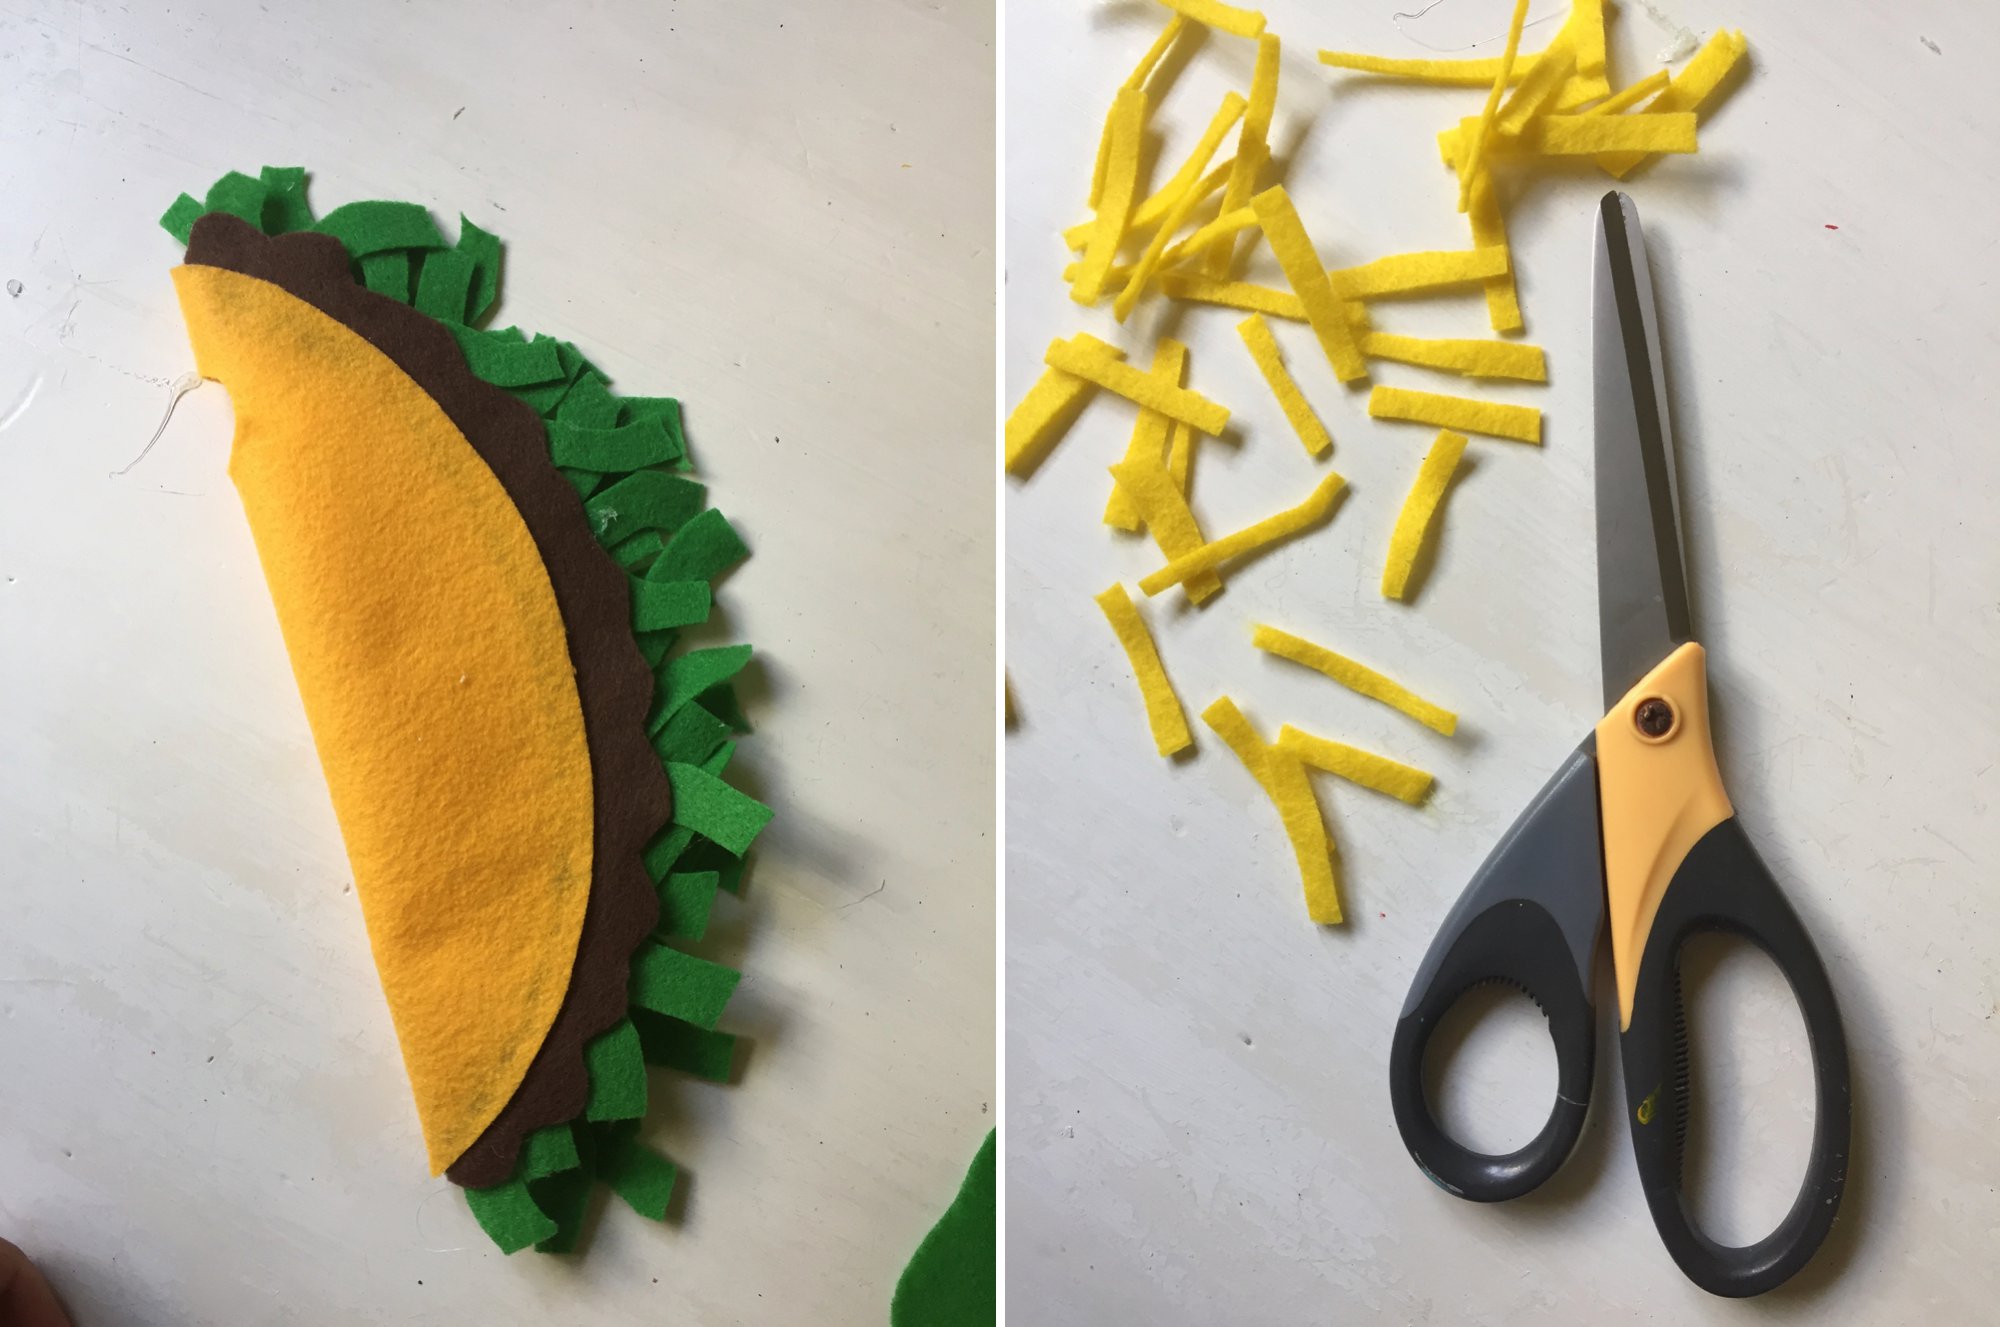
15. Cut out lots of thin strips of yellow felt to look like “shredded cheese.”

16. Using the glue gun, attach the “shredded cheese” to the OUTSIDE of the “lettuce” strips. Again, arrange the pieces in a random manner.
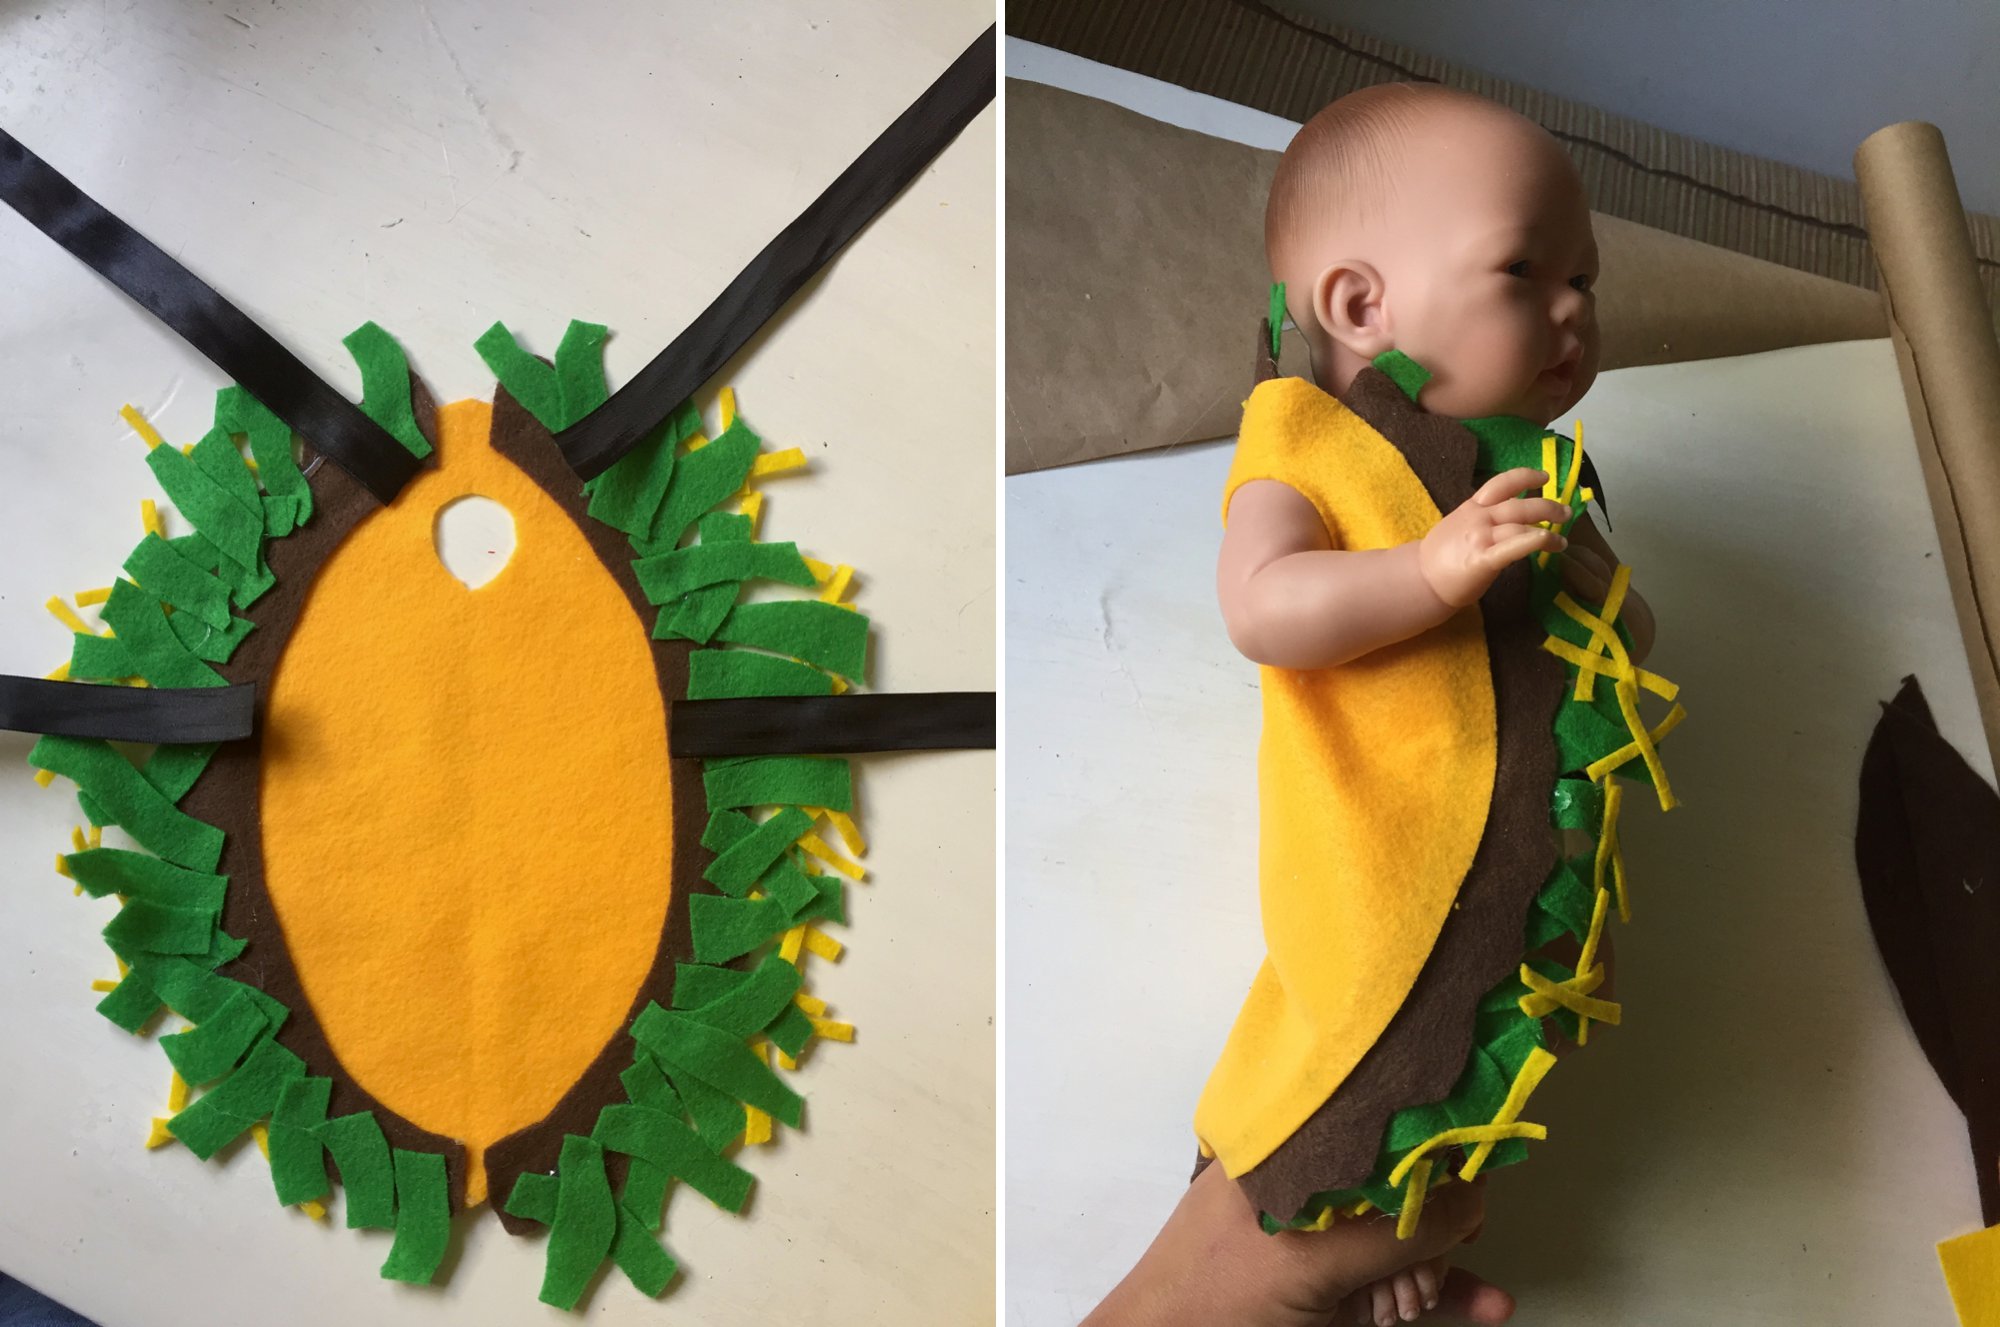
17. To finish the costume, open the taco up and attach the ribbons to the INSIDE of the shell using the glue gun. Attach two towards the top of the arm hole (so it will tie over the shoulder) and two just above the middle of the costume (so it will tie under the arm).

We’ve absolutely LOVED looking back through these photos of our sweet little taco baby! It was such a memorable first Halloween costume, and I had so much fun making it that we’ve gone the DIY route with our kiddos costumes ever since…
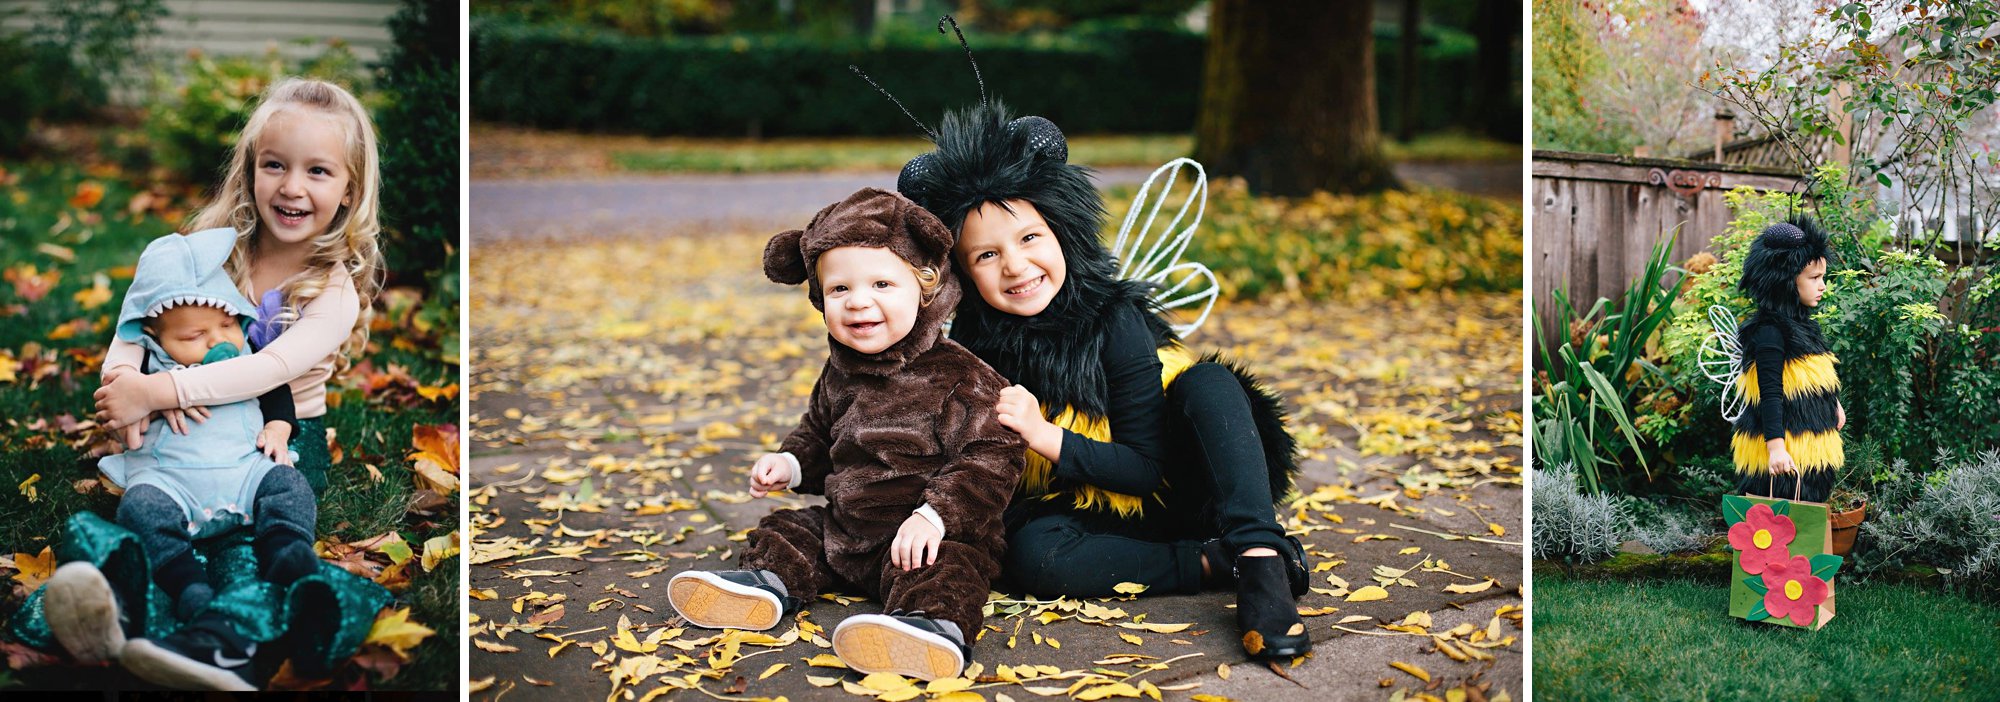
We cannot wait to start working on this year’s costume!
Also…
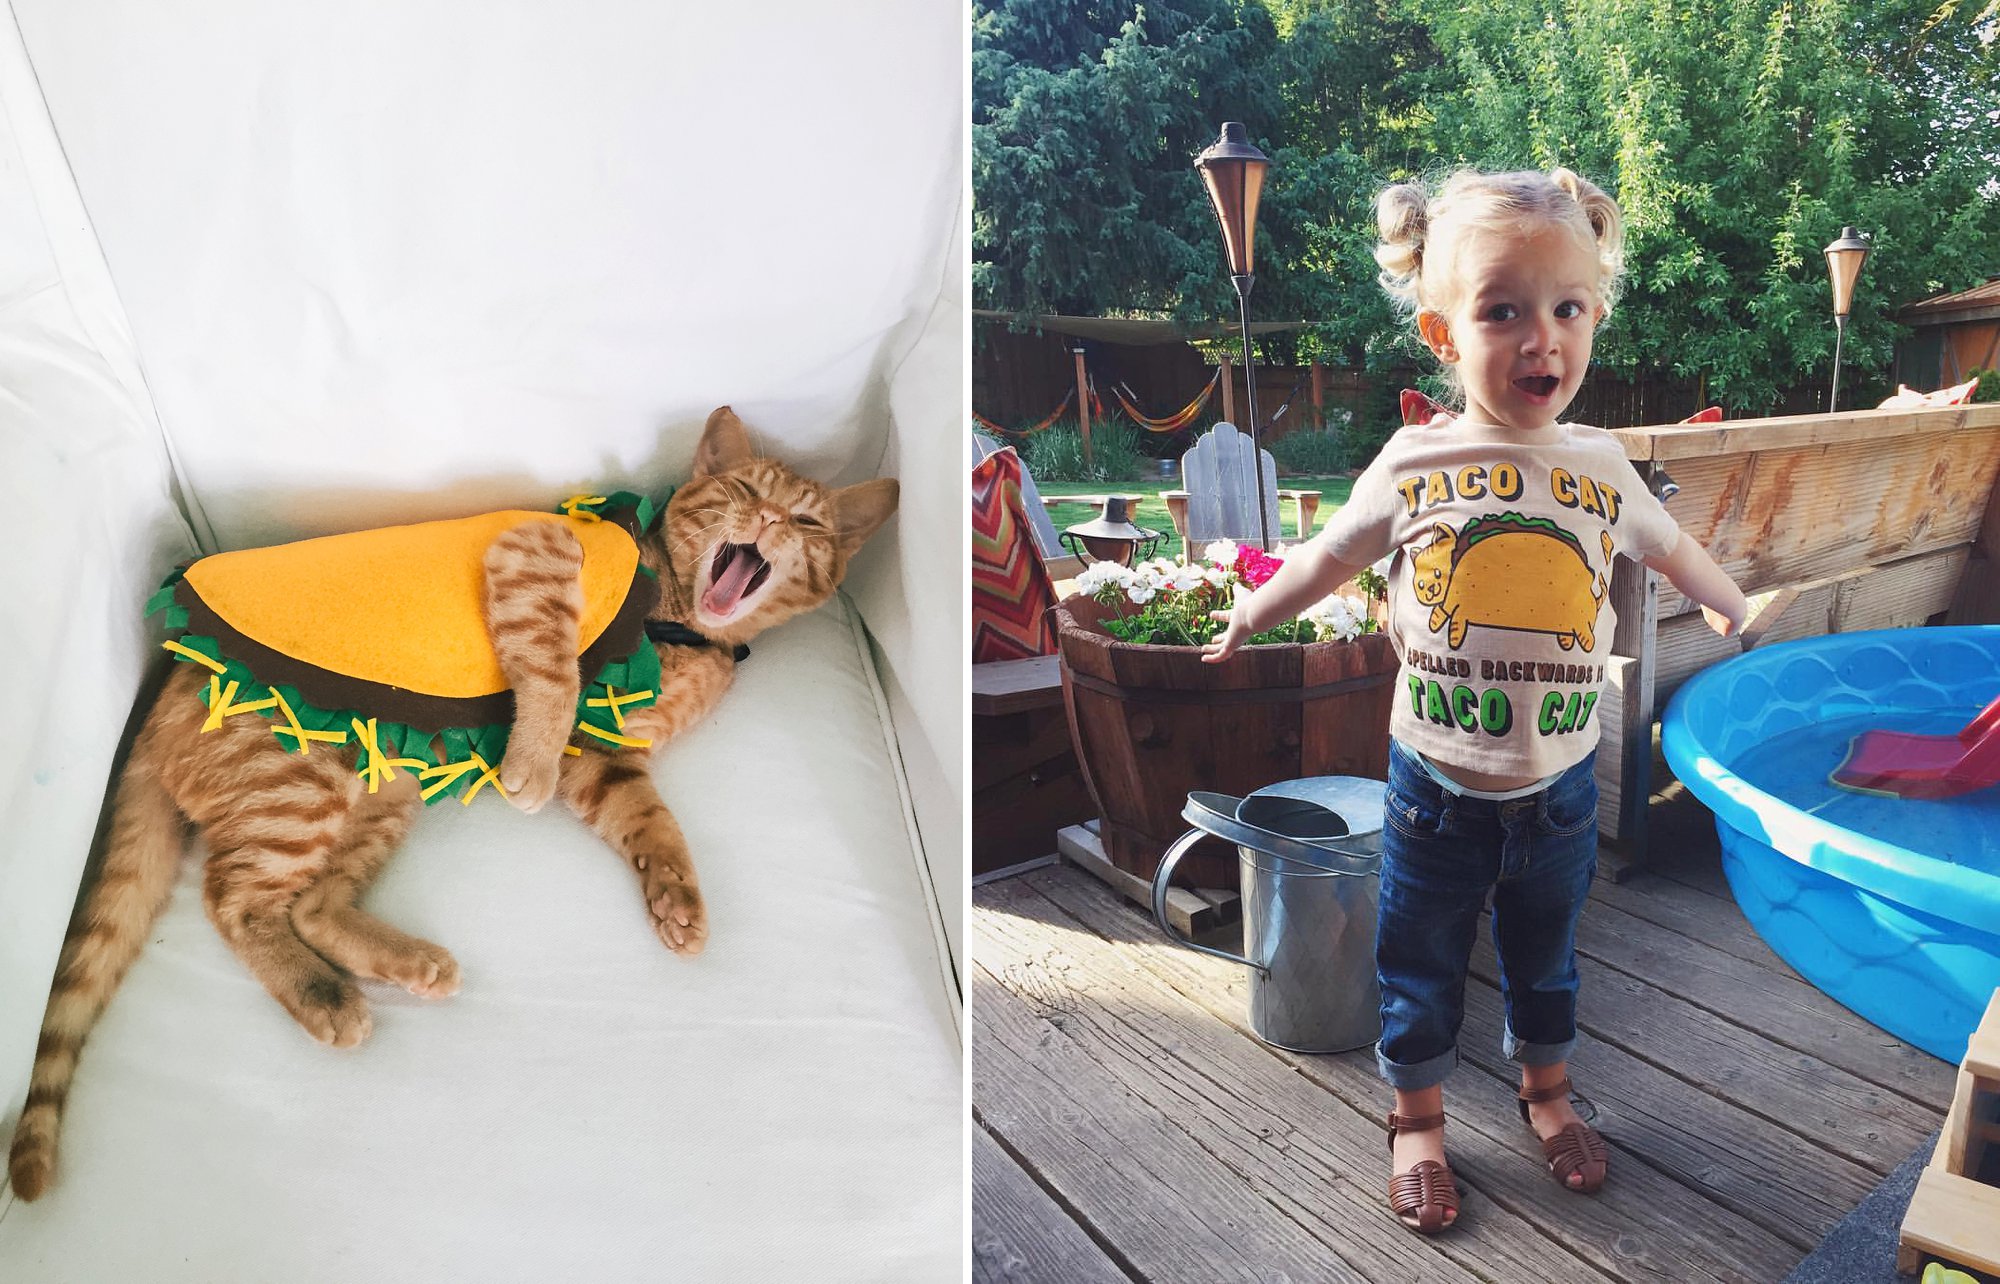
TACO CAT spelled backwards is TACO CAT. Sorry, I couldn’t help myself.


One comment on “DIY Toddler Taco Costume Tutorial”
Comments are closed.