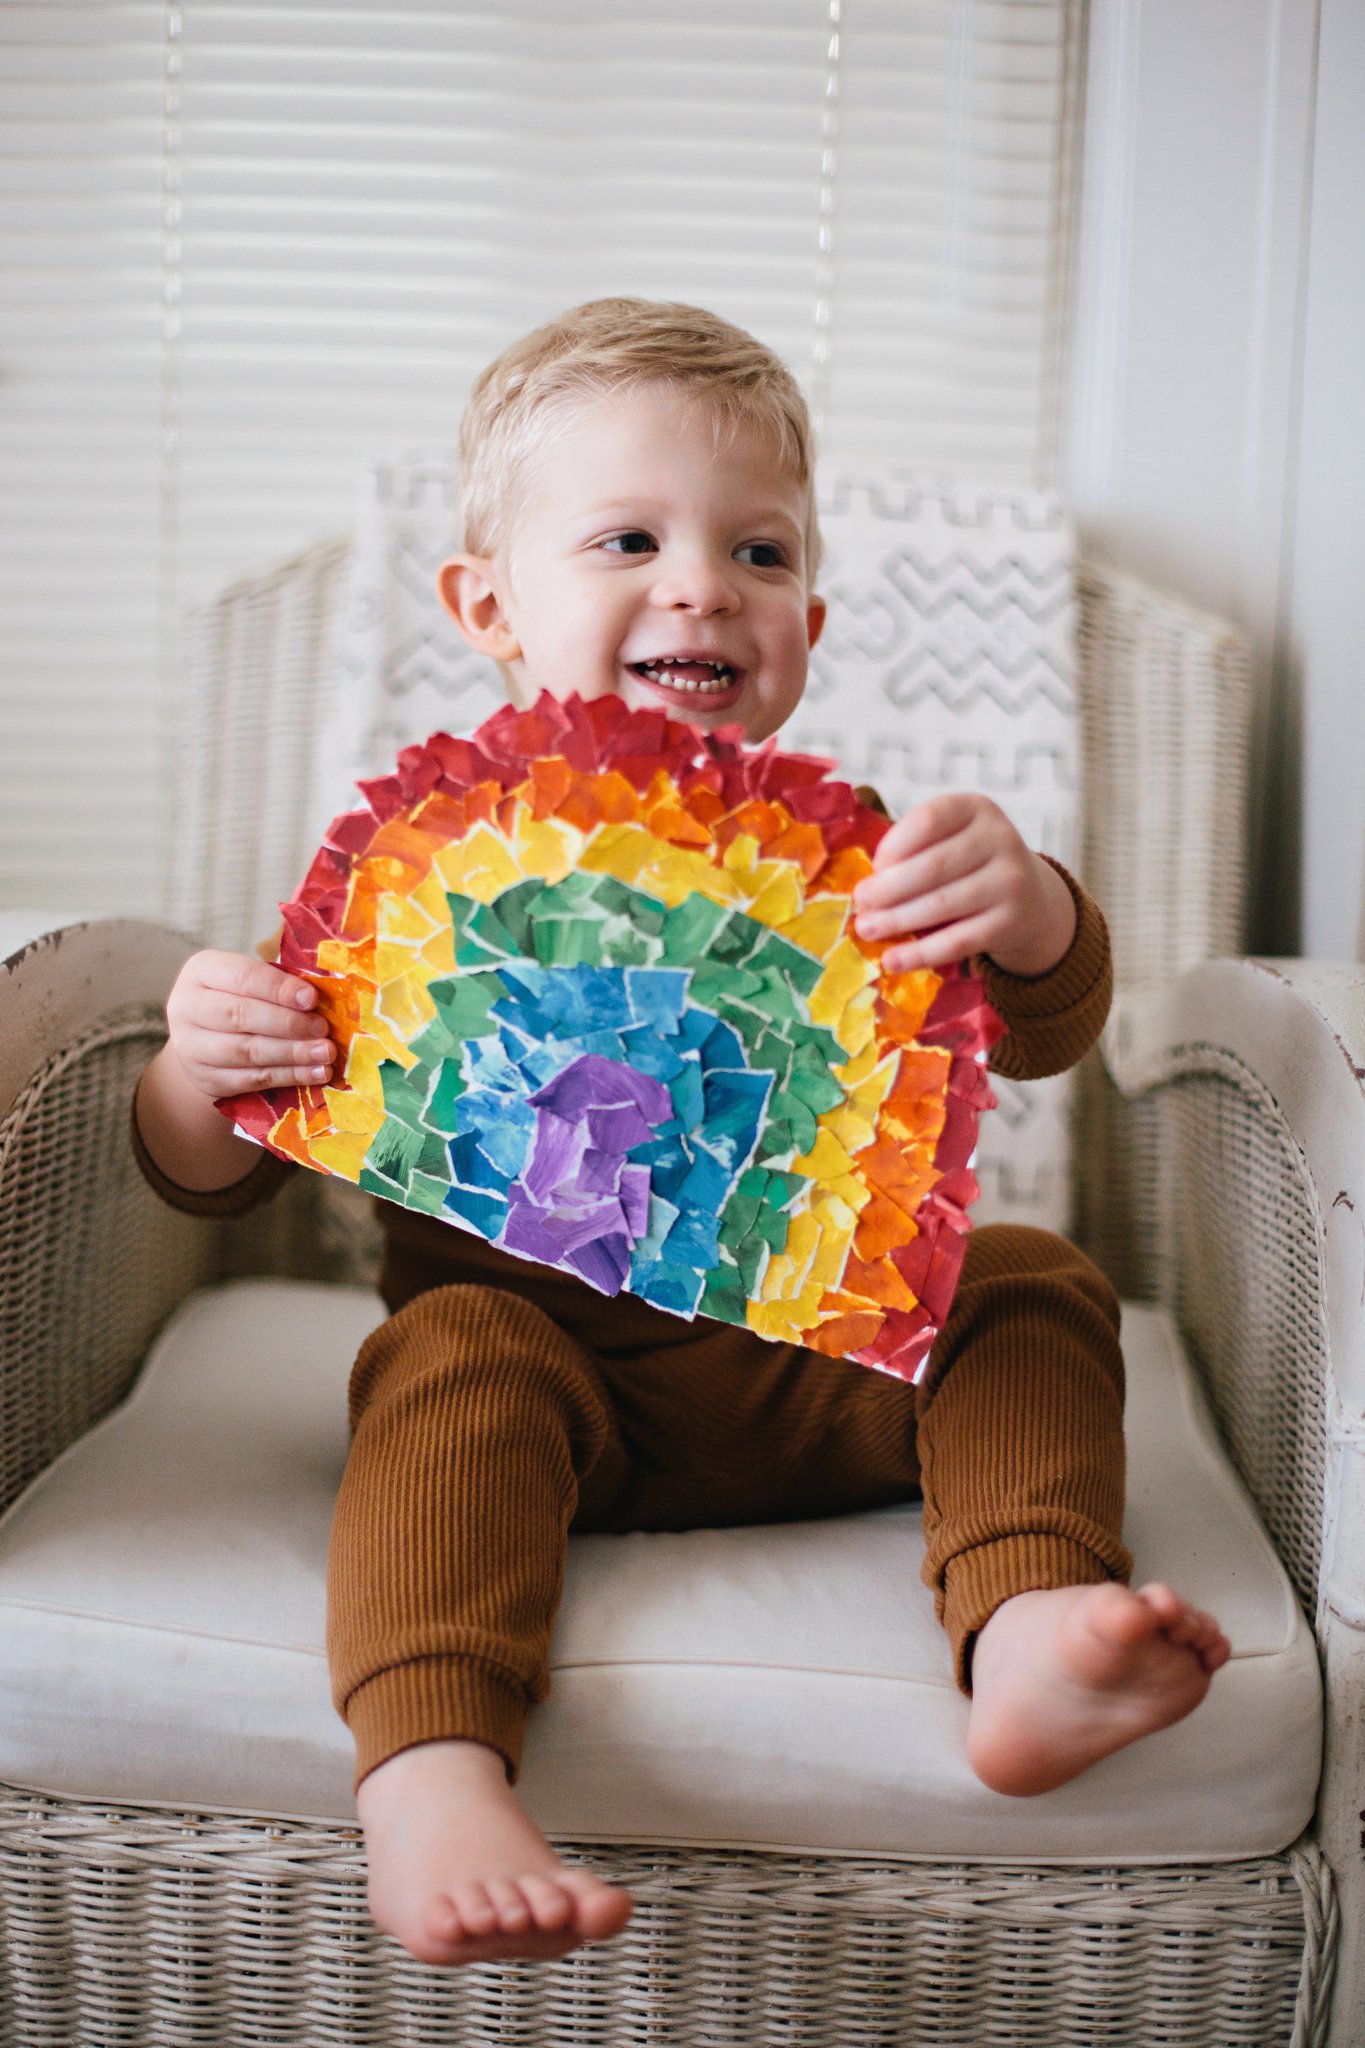
Happy St. Patrick’s Day, friends! We are excited to share this adorable rainbow collage craft that is perfect for toddlers and big kids!

SUPPLIES:
- colored construction paper (red, orange, yellow, green, blue, purple, white)
- paint brush
- acrylic paints (several shades of each color)
- glue stick
- scissors
- smock
- wipes (we like to keep these on hands for quick wipe downs)
PAINT
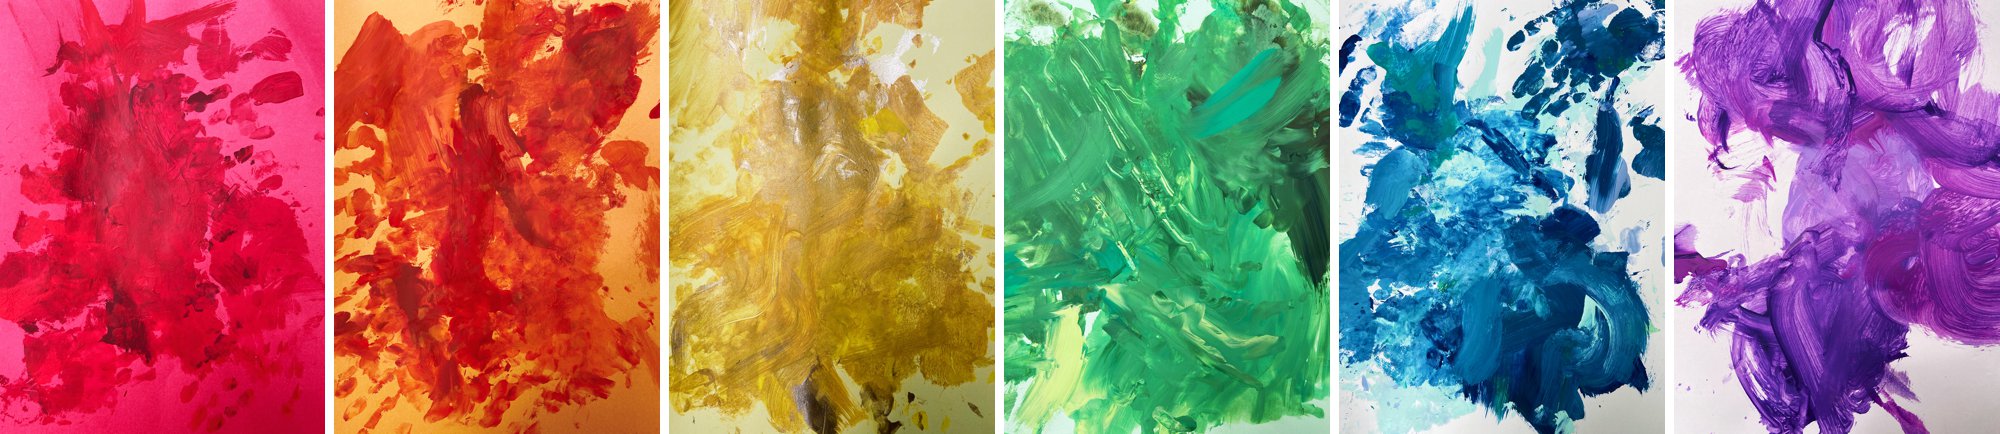
- Start by painting the individual colors of the rainbow on their respective colored papers. We used colored papers so the finished painting would be more vibrant.
- I squeezed little dabs of red paint (using several different shades) directly onto the red paper and Cole began painting away with his brush and his hands. This kid is all about painting his hands and stamping them onto the paper, so I just roll with it. Also, given what an enthusiastic painter Cole is, I was focused on keeping the paint in the right place and so I didn’t take any photos of these steps!
- Repeat painting with orange, yellow, green, blue, and purple papers.
- Once the paints are thoroughly dried, you can tear the papers into little pieces. Keep the torn papers separated by color. Your kiddo can definitely help you with this step.
Please note that you can easily spread this project across several days to best meet your child’s attention span. We took four separate settings to complete this project— two for painting and two for the gluing.
COLLAGE
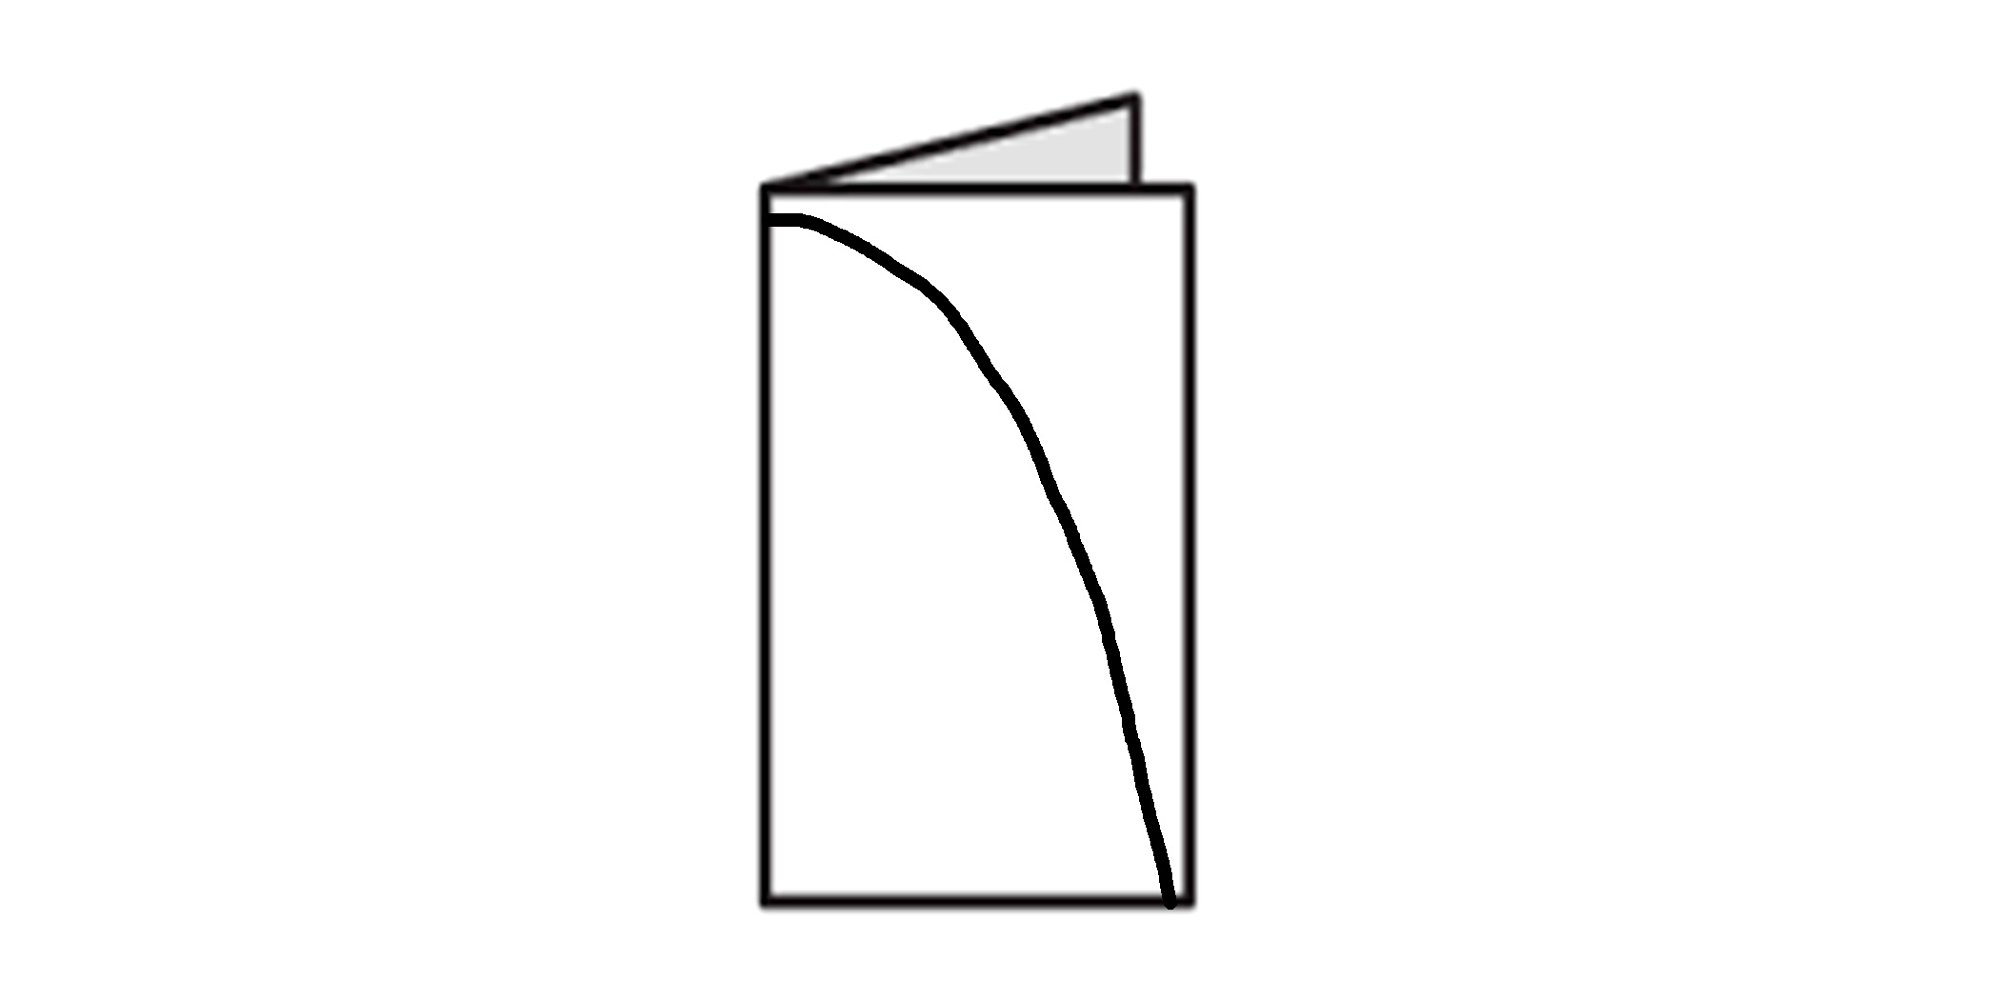
- Take a piece of white construction paper and fold it in half. Then cut an arc shape starting at the top of the folded side and ending at the bottom corner of the open side. When you open the paper you have an even rainbow.
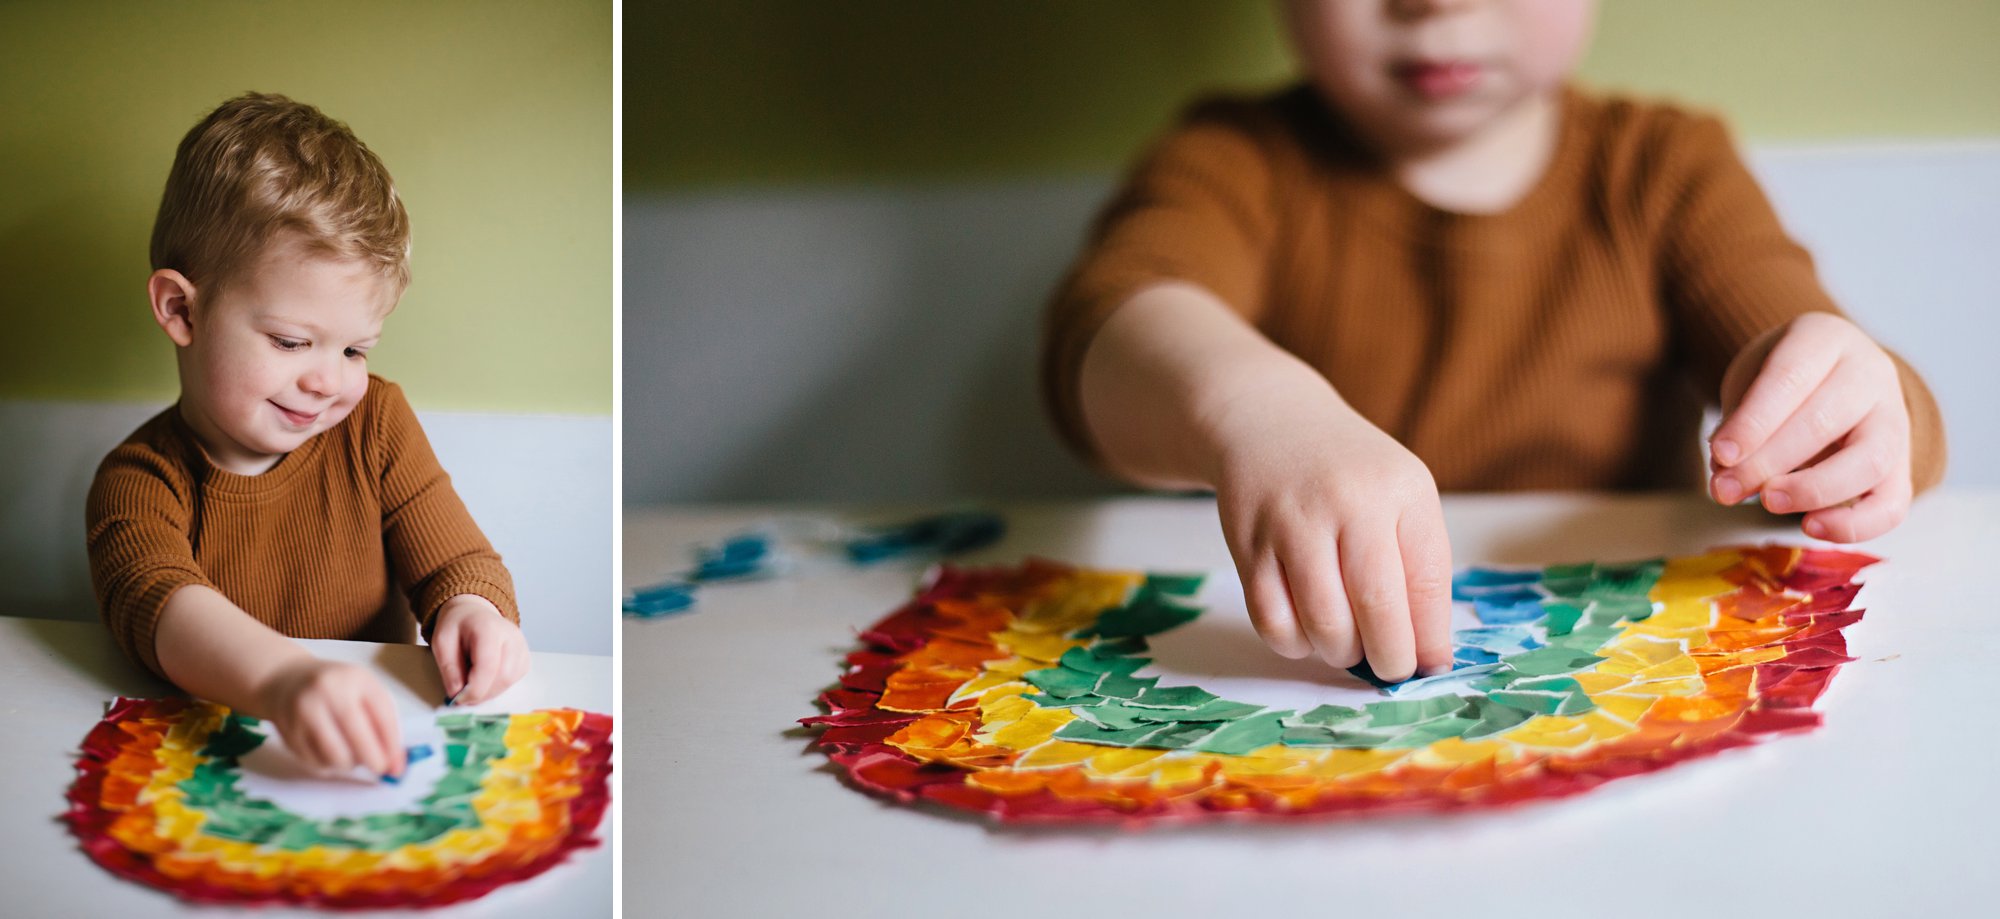
- Flatten your rainbow-shaped paper, and use a glue stick to run a line of glue along the outer edge. Have your child press the red papers into the glue, painted side up. You may need to help with this a bit. Continue until you have covered the entire outer edge.
- Next run a line of glue just inside the red papers and begin pressing the orange papers into the glue. It’s okay if they overlap the red papers a little.
- Continue this process until you have filled the rainbow with color
- Don’t forget to write your child’s name and date the back– your nostalgic heart will appreciate it years down the road!
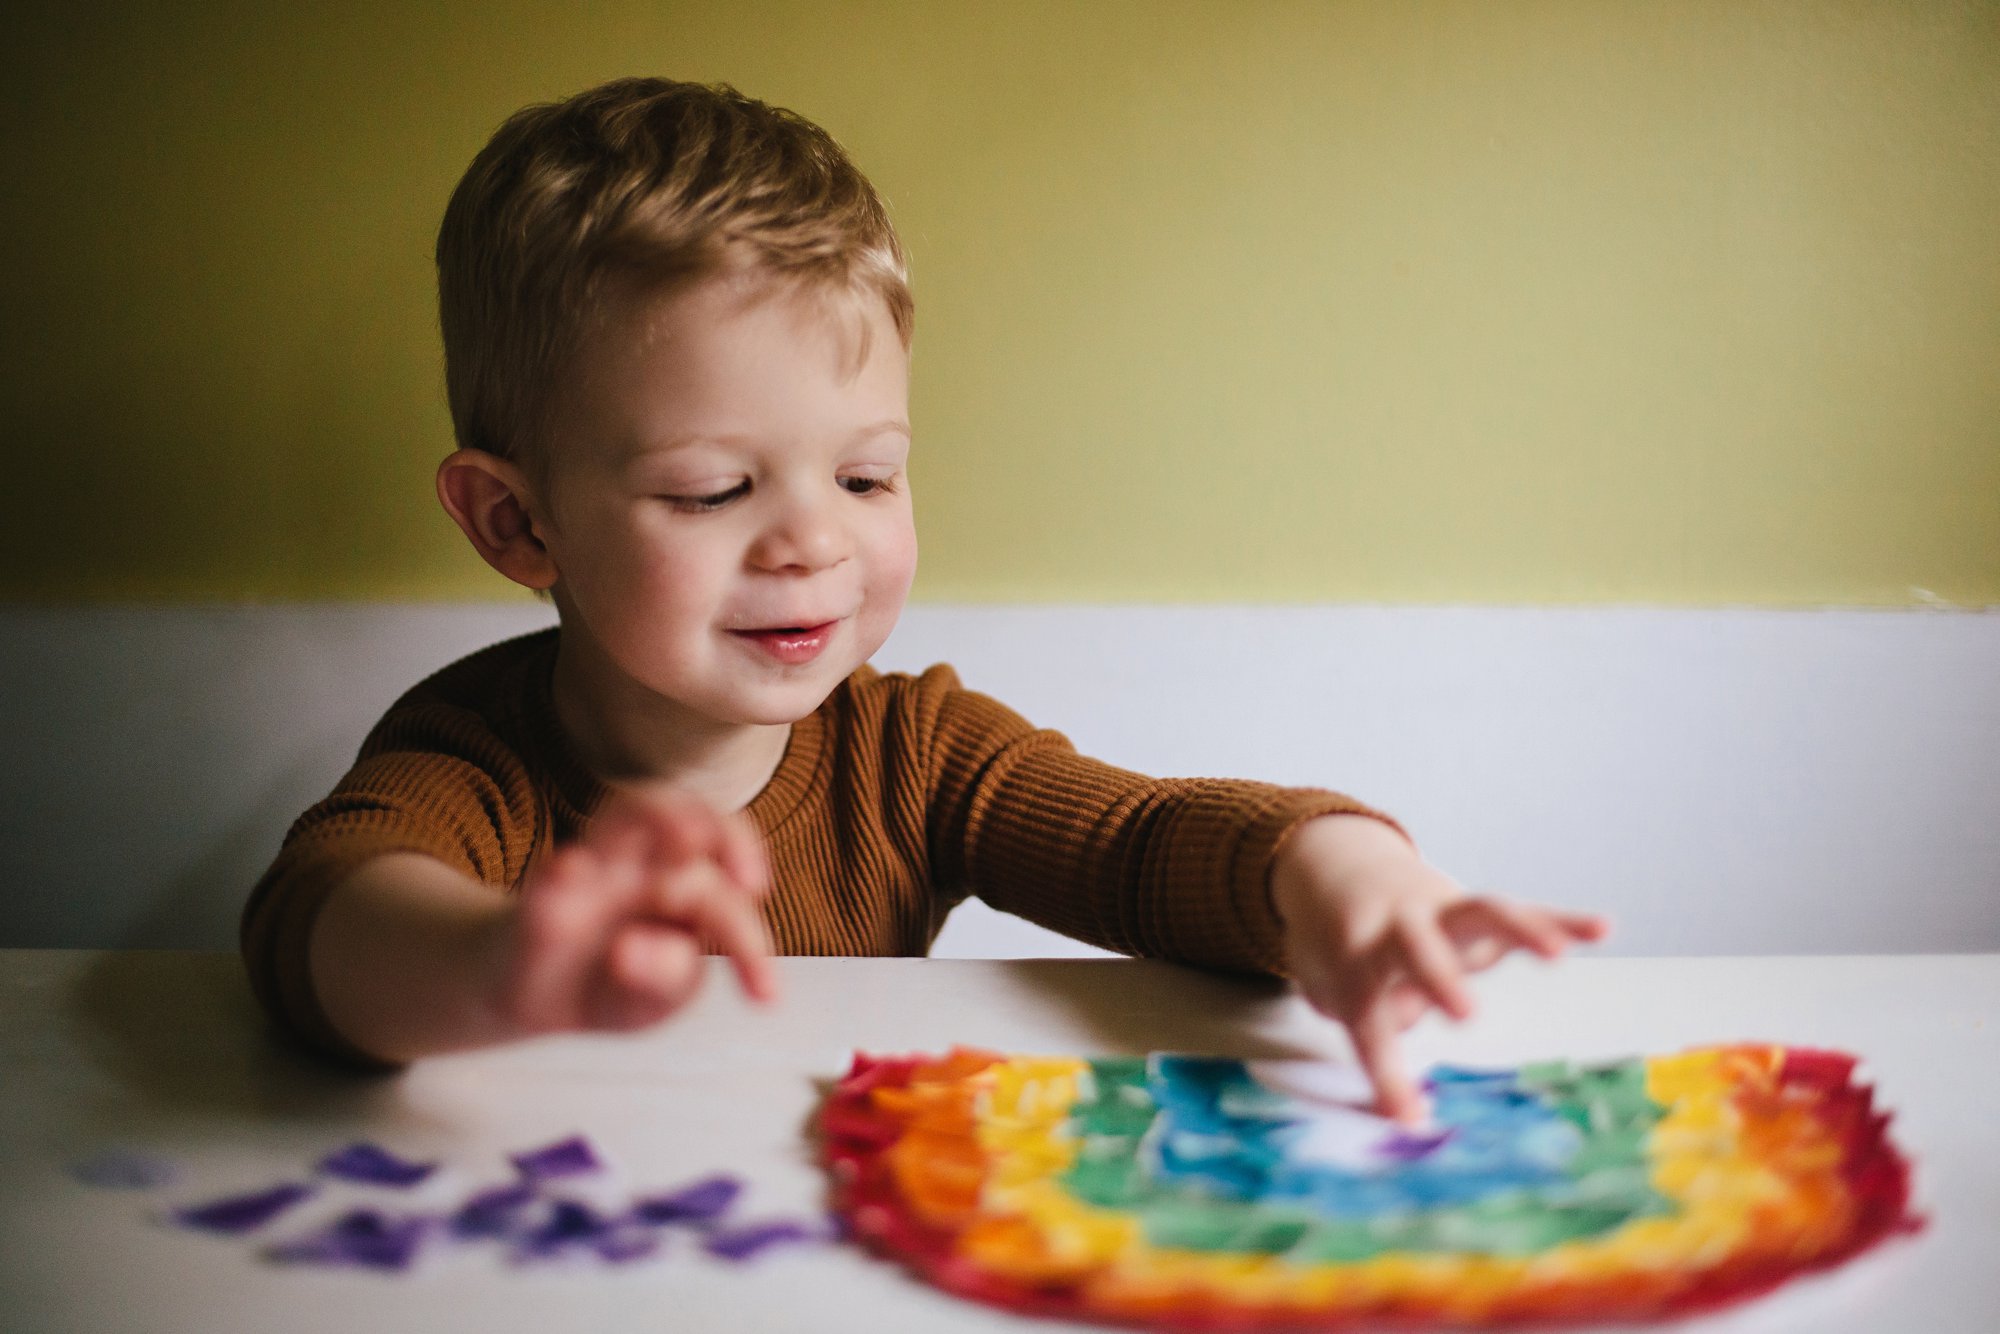

Cole was SO proud of his rainbow and couldn’t wait to hang it in his art gallery. The color and textures really pop! It looks so cheerful up there!

BONUS craft idea: We made this sweet 4-leaf clover picture using Cole’s painting and our Silhouette Cameo. I had Cole paint with several shades of green acrylic (he used a brush and his hands) and let it dry thoroughly. Then I found a free 4-leaf clover outline by doing a google search, saved it to my computer, used the Silhouette to cut out a bunch of clovers from the painting, and glued them onto a piece of sturdy white paper. I made sure to cut the white paper to 5×7 first so that the artwork would fit into a standard frame if we wanted. If you don’t have a Silhouette there are two simple alternatives:
- find a picture of a shape you like online, print it, cut it out and use it as a stencil over your child’s painting
- find a picture of a shape you like online, print it on watercolor paper, have your child paint all over the BACK of that paper. Then when the painting is dry you can follow the shape on the non-painted side to cut it out.
You can find the four leaf clover outline we used HERE.
Looking for other St. Patrick’s Day crafts? We shared a 4-leaf clover potato stamping project HERE.
Wishing you a day filled with rainbows and the very best luck! Happy crafting!