A few weeks ago my friend, Kayla Anne, shared the most adorable wooden wind chime she and her daughter made together. They collected sticks, painted each one a different shade of the sunset, and then strung them together into the sweetest piece of art. We were totally inspired and set to work making a beachy version for the wall in the kids’ room.

Supplies Needed:
- Driftwood or smooth sticks (1 large and 5-7 small)
- Masking tape
- Acrylic paints
- Paint Brushes
- Electric drill with small bit
- Twine
To Create:
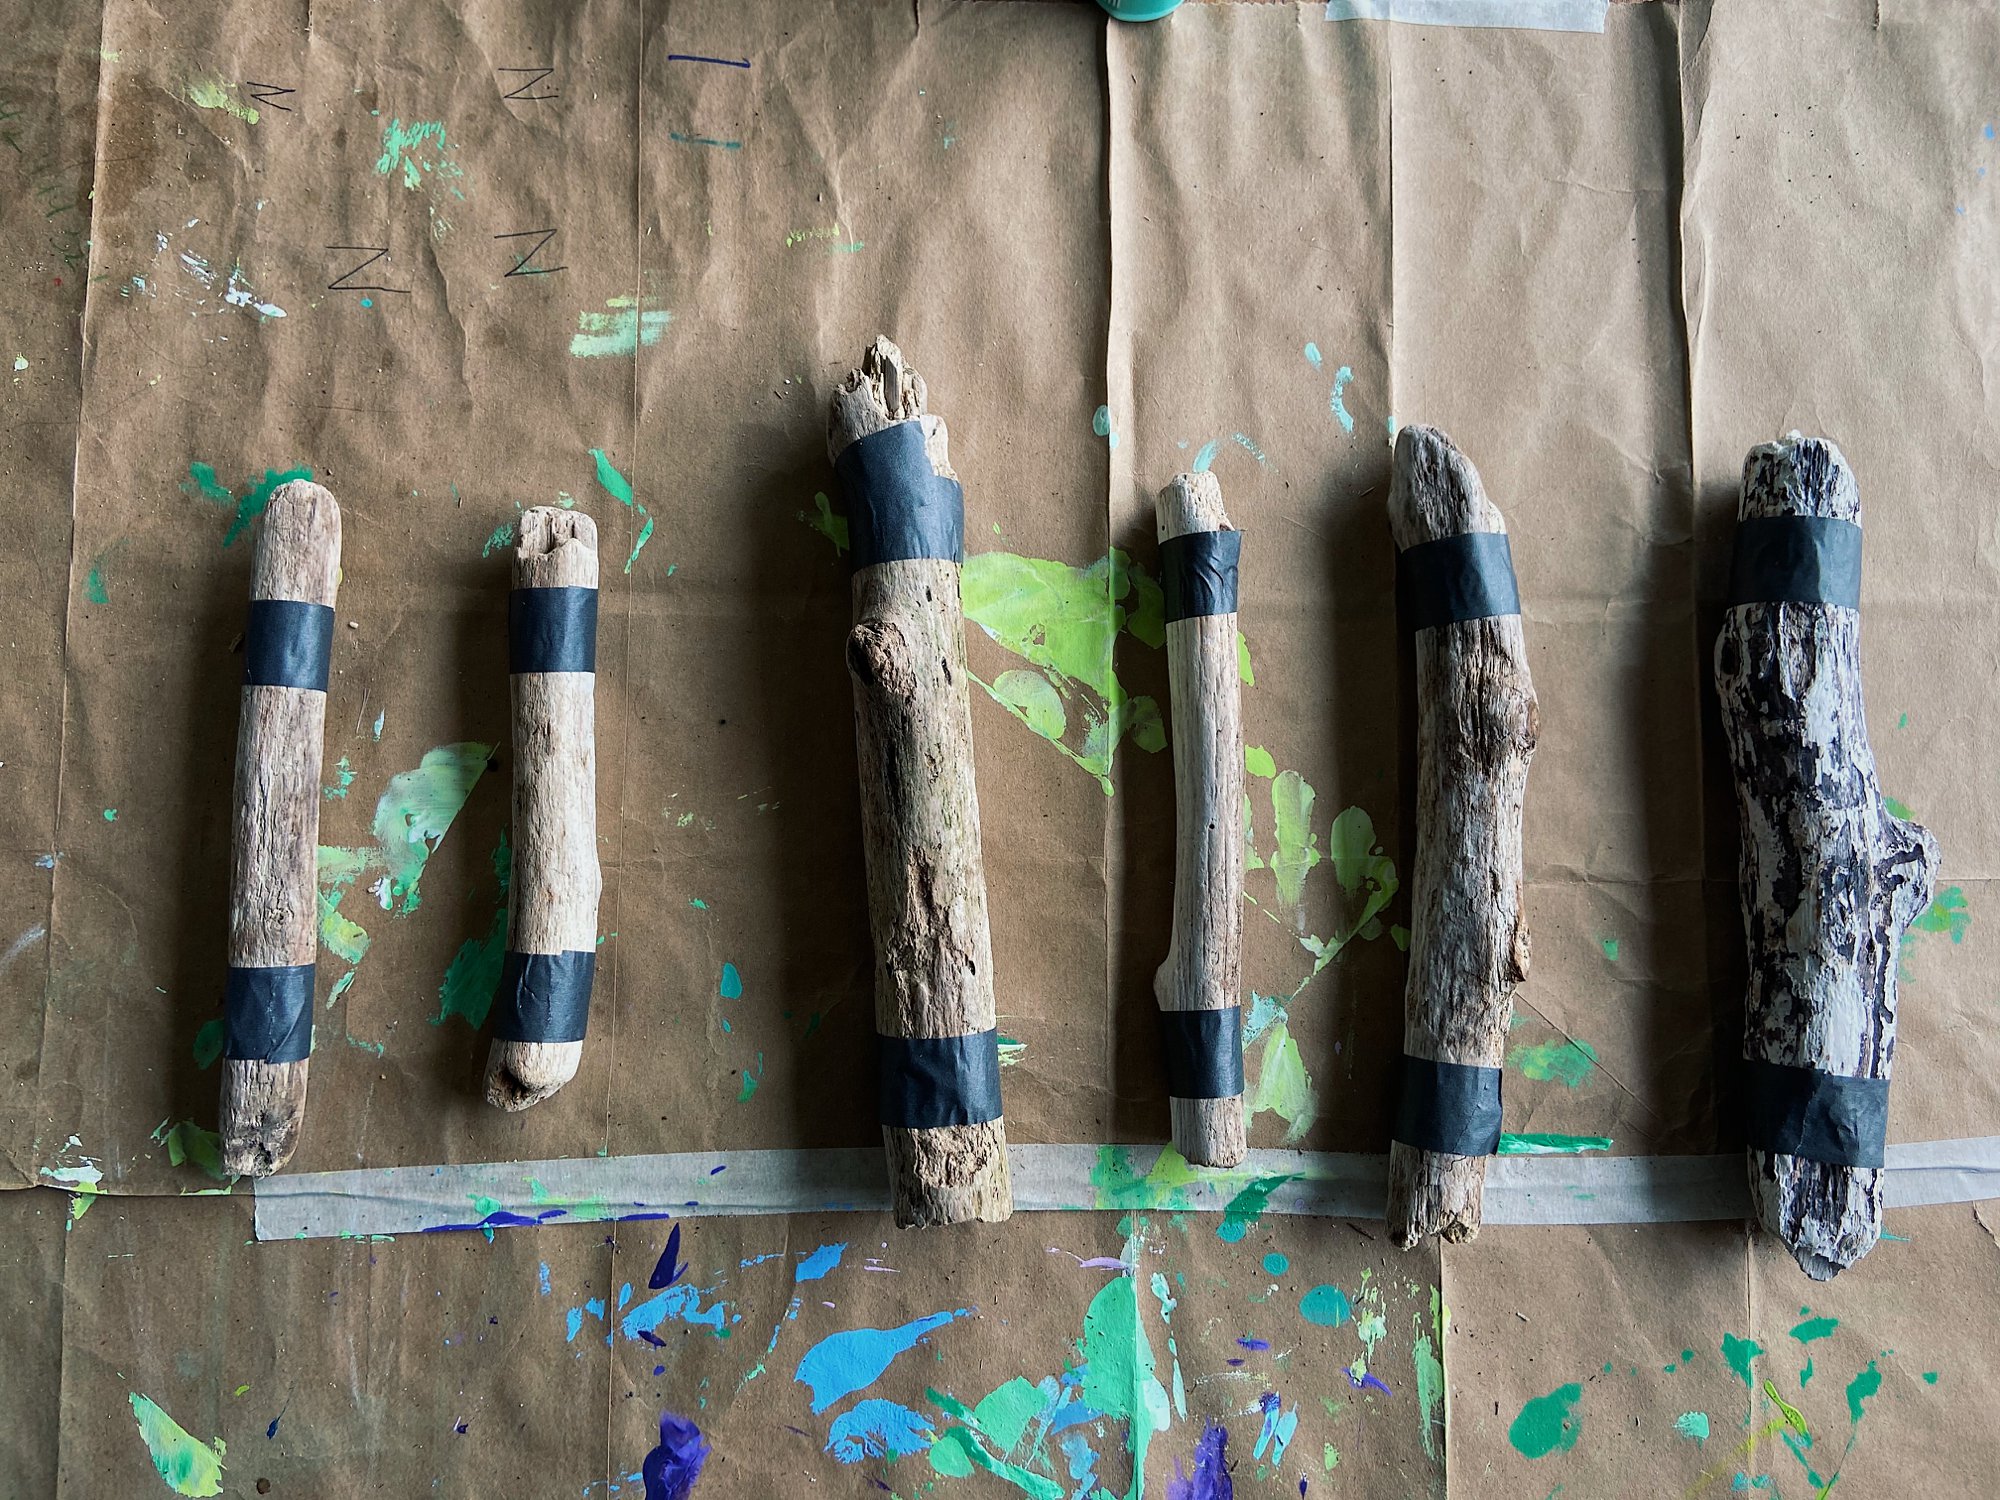
Enjoy some time outside and collect your driftwood– this is one of the best parts of the craft! You’ll need one larger/longer piece of driftwood and 5-7 smaller pieces of driftwood.
Make sure your driftwood is clean and dry. Set aside the large piece, as you won’t need it until the end of the project.

Apply a strip of masking tape around each end of the smaller driftwood pieces. Once you have the tape where you want it, press it down firmly so that there will be a clean paint line. It’s up to you how much raw driftwood you leave exposed on the ends– we left about 1.5″ on each. Also, if you are painting with really little artists you may want to cover the entire ends of the driftwood, either with tape or wrap them in paper towels, so they don’t get paint on them.
Paint the middle sections of the driftwood thoroughly with acrylic paint and set aside to dry.
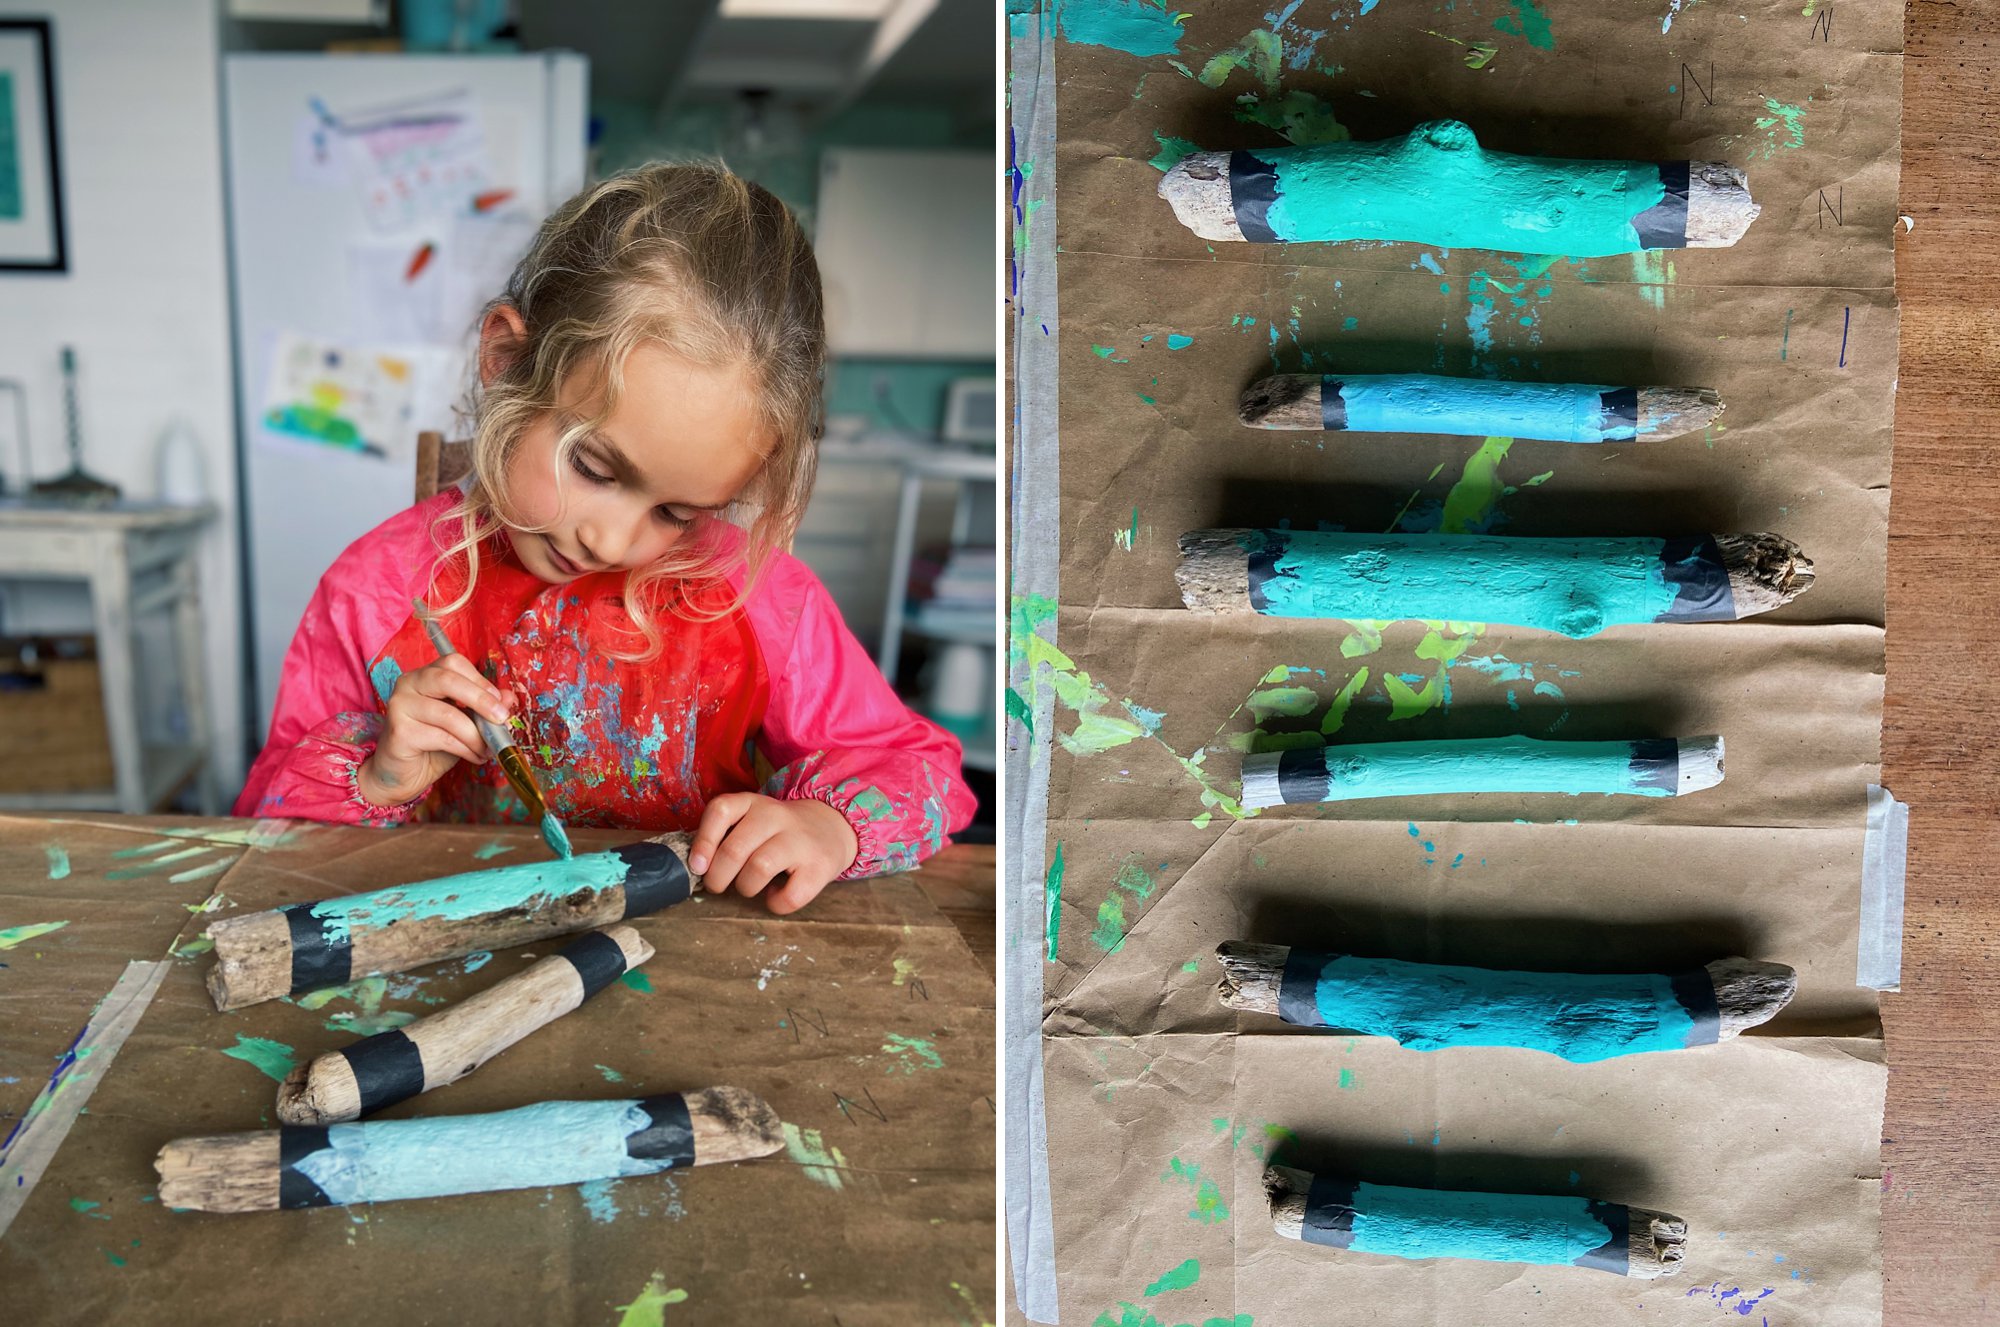
Carefully remove masking tape from the driftwood. We removed ours about 15 minutes after we finished painting, so that the paint hadn’t completely dried and the line stayed really clean.

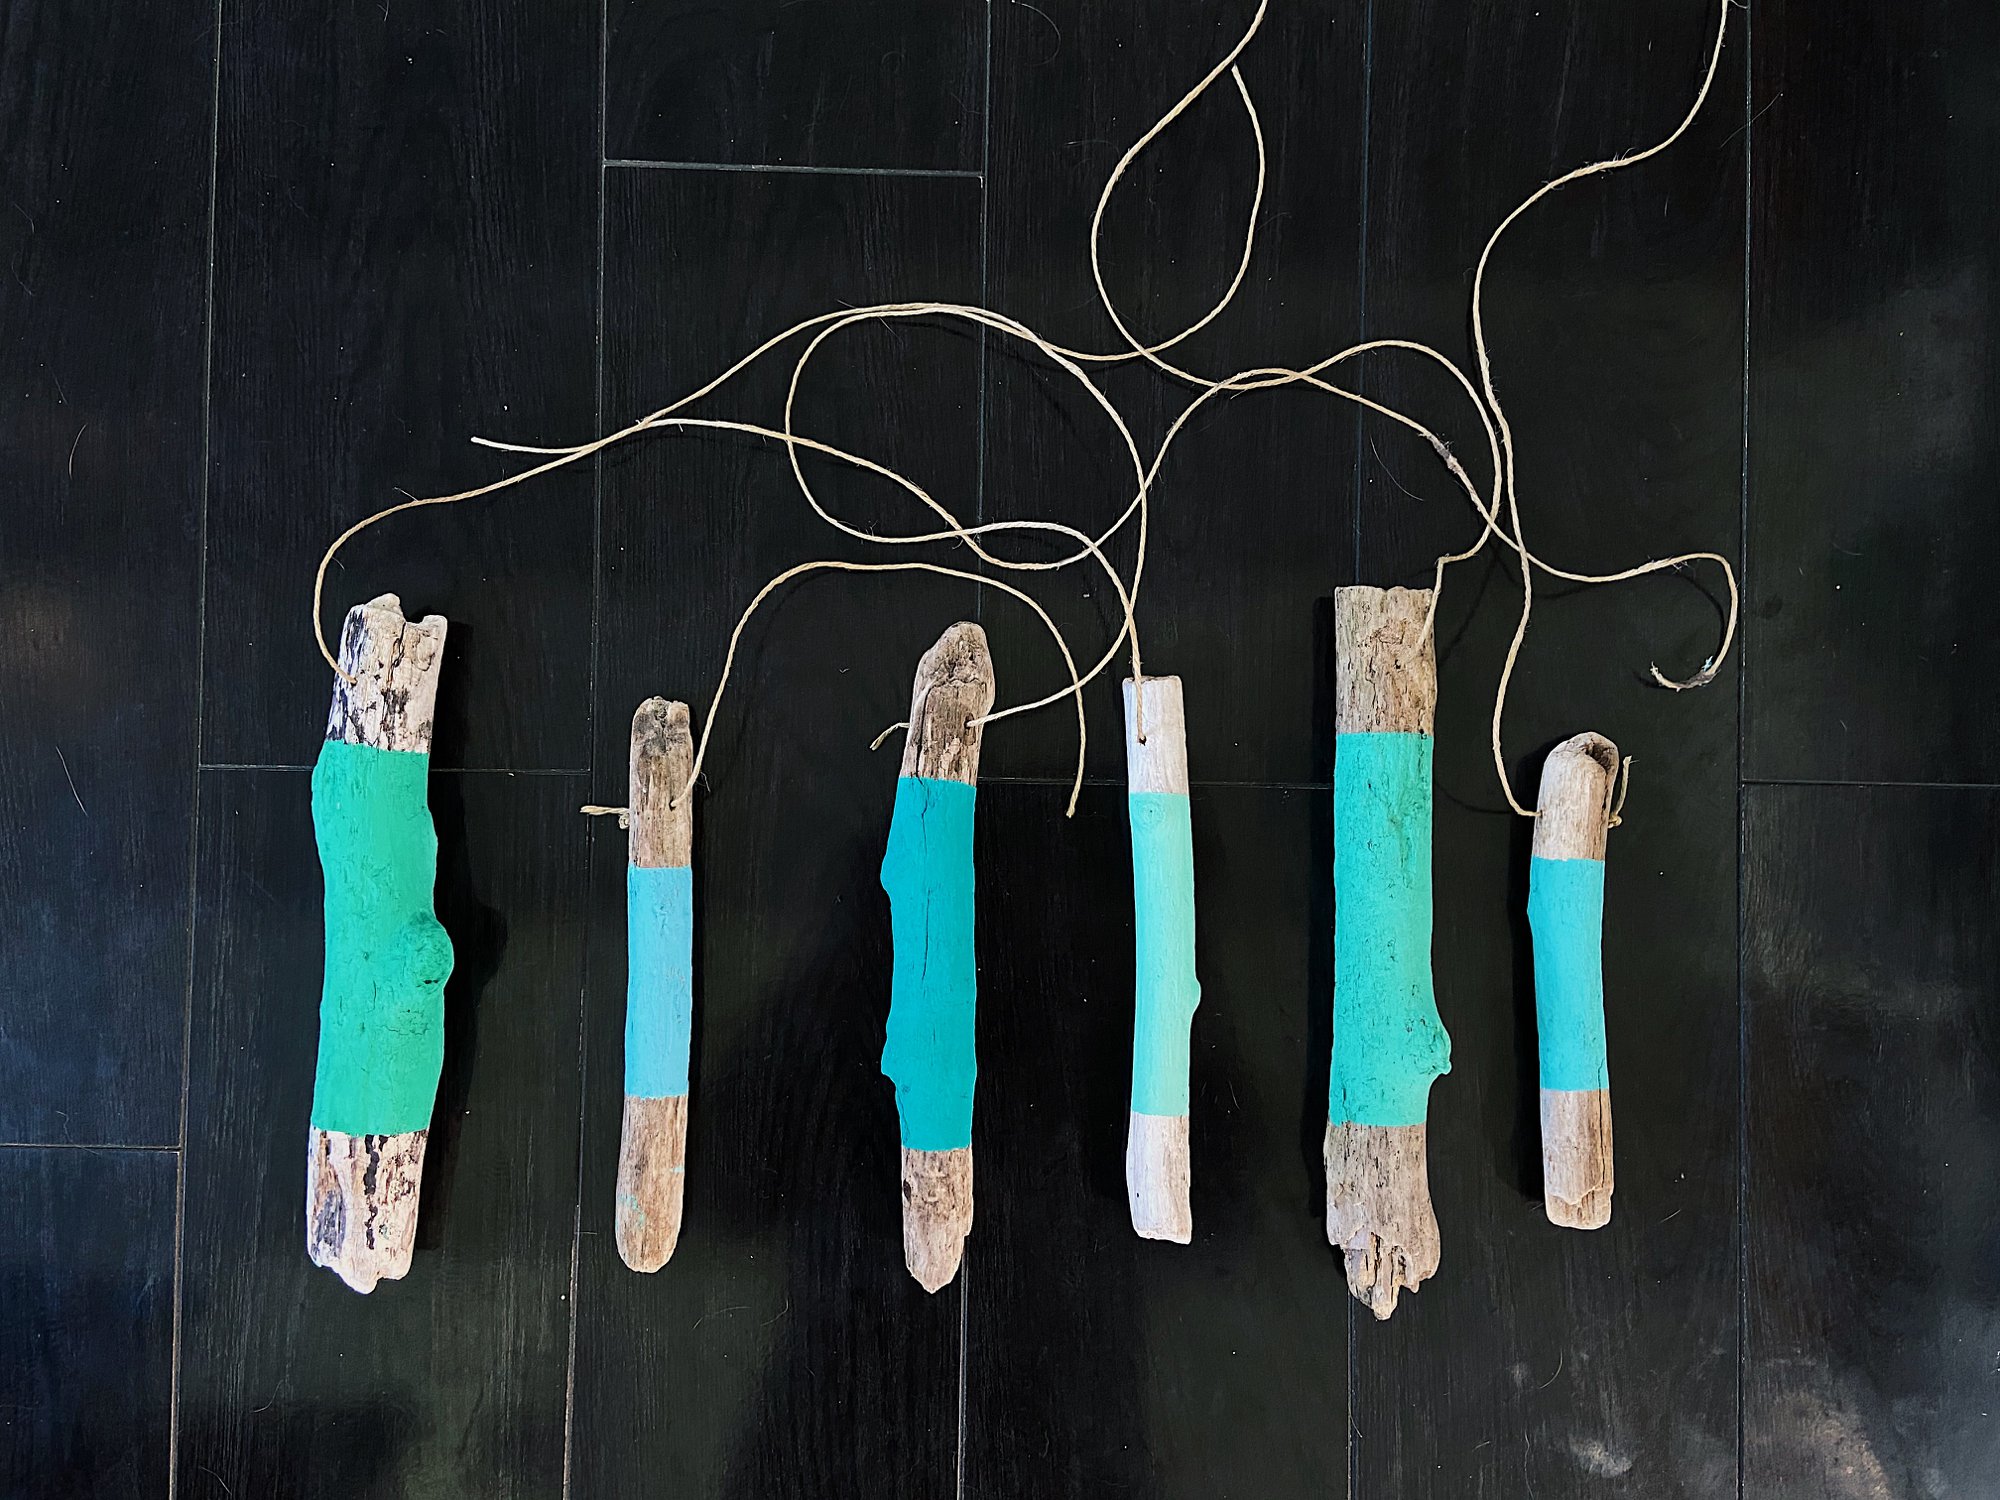
Once the paint is completely dry, drill a hole through one end of the driftwood, approximately 1″ from the top. Thread a length of twine through the hole and knot it thoroughly on one end. Repeat with other painted driftwood pieces.
Lay out your painted driftwood pieces in a line so that you can see how they look together. Mix them up so that you have an arrangement of shapes and colors you like.
Retrieve the large piece of driftwood and tie the ends of the twine pieces around it, keeping the smaller driftwood pieces in order. This was the trickiest stage for us, as it requires a little tweaking to get the pieces to hang just right. Finally, trim all extra ends of the twine and hang your finished piece!

So fun, right?! I think this may be just the beginning of our painted driftwood crafts! Thanks again for the inspiration, Kayla Anne!